Billing Overview
Here are you can see the Billing Overview for upcoming months.
There are 5 Tabs
• Acounts Mapping
• Usage Files
• Rating Issues
• Invoices
• Discount Plan
• One/Off Recurring (this tab will only show if integration with Giacom is enabled
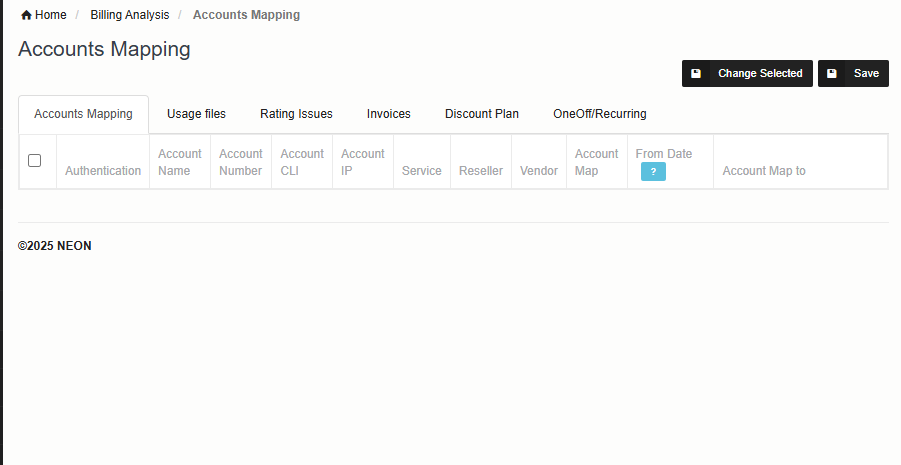
Accounts Mapping
When importing data from various sources into NEON, CDRs may belong to multiple accounts. Occasionally, some data may not be properly mapped to the corresponding NEON accounts. This screen is designed to help identify accounts that are missing or not yet mapped.
You can manually map these accounts, and once mapped, the associated CDRs will automatically be linked to the selected accounts.
To streamline this process, you can use the filter feature. Simply click on the filter icon, enter the required fields, and the system will display details of both mapped and unmapped accounts.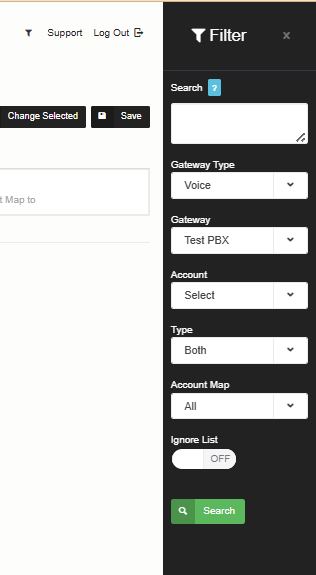
| Field | Description |
| Gateway Type | Voice, Mobile or SMS |
| Gateway | Select the gateway from the drop-down |
| Account | Select account type |
| Type | Select the type for vendor, customer, or both |
| Account Map | Yes, No or all |
| Ignore List | Ignore the accounts which you dont want to map |
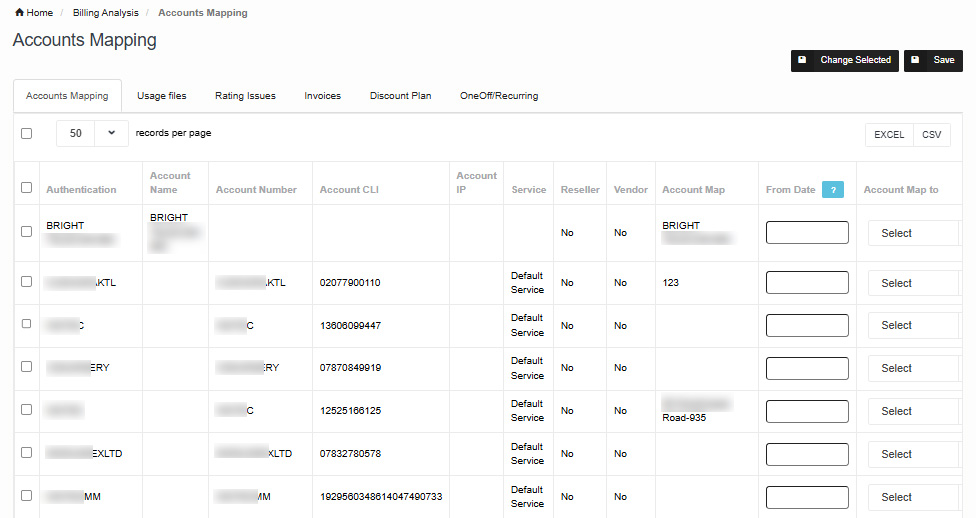
Here, you can view the details of all accounts, including which ones are mapped and which are not.
To map a specific account, click on the "Account Map To" dropdown and select the account you want to link it with.
You can also specify the date from which you want to move the CDRs. If you leave the date field blank, all CDRs from the beginning will be moved.
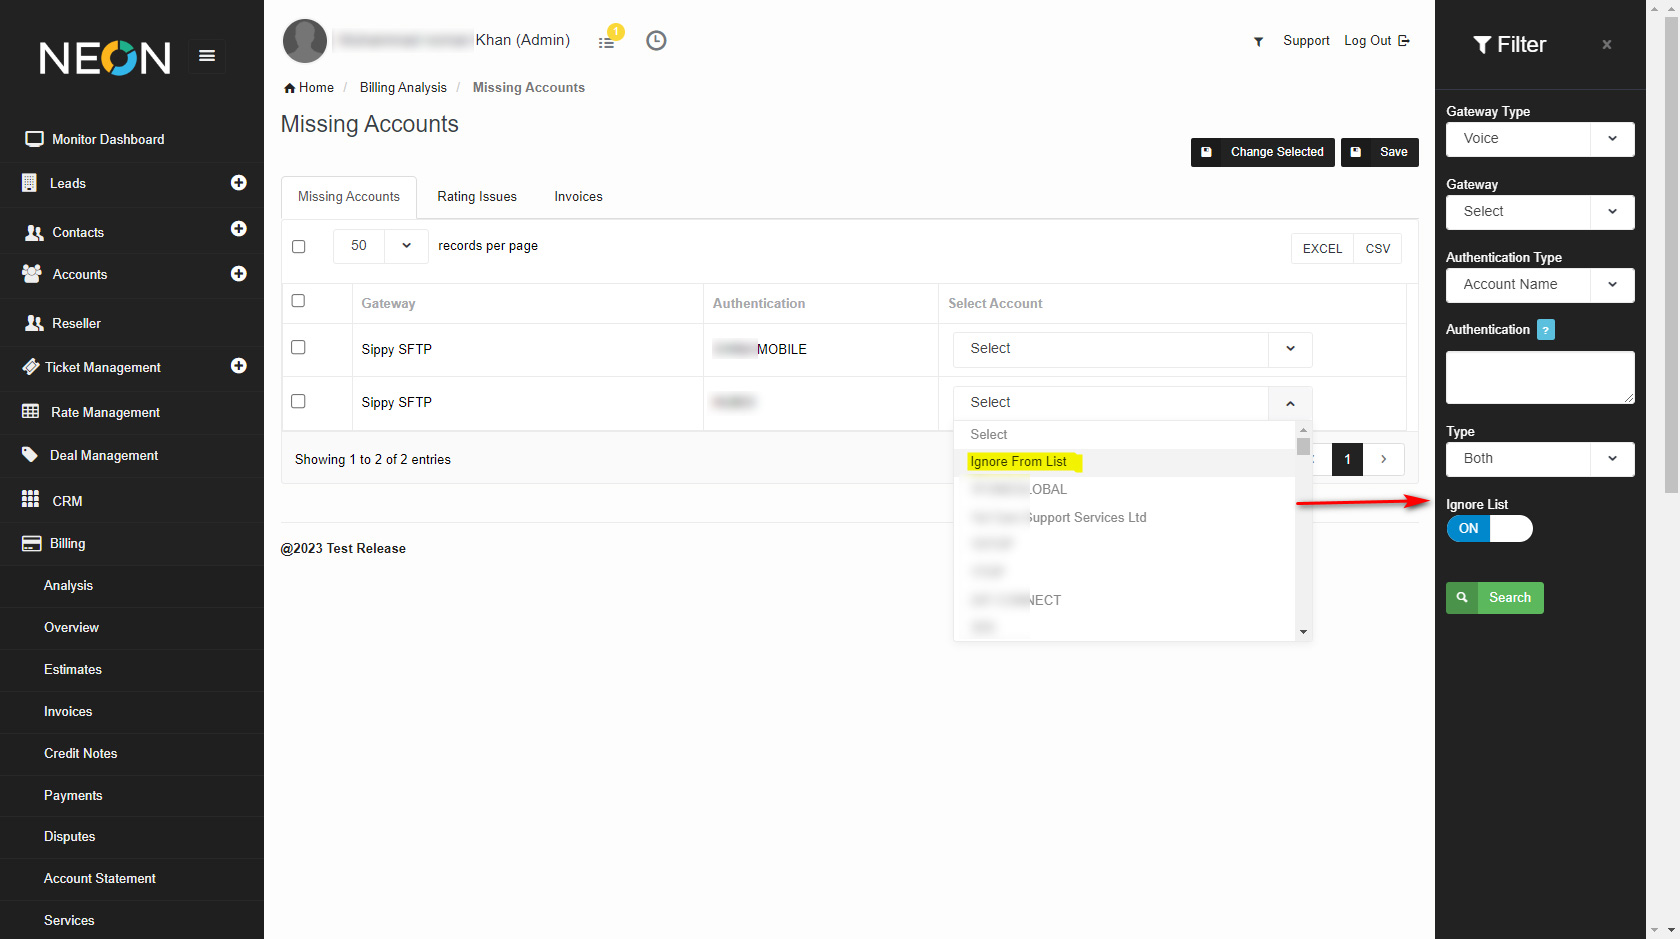
Ignore List
For any account you don’t want to map, just select Ignore from List in the drop down. You can filter on Ignored accounts as shown below:
Usage Files
To access the new feature:
- Login to your NEON account
- Navigate to Billing → Overview → Usage Files

- Functionality
- Users can select one or more files using checkboxes and click "Reprocess"
- By default, the screen displays 1-day data for faster loading and access
- Columns Displayed on Screen

|
Column Name |
Description |
|
File Name |
Name of the usage file |
|
Company Gateway |
The associated gateway used for this file |
|
Message |
System notes or processing messages |
|
Created At |
Timestamp when the file was created |
|
Updated At |
Timestamp of the last update |
|
Processed At |
When the file was processed |
|
Checkbox |
Used to select files for reprocessing |
- Filters Available
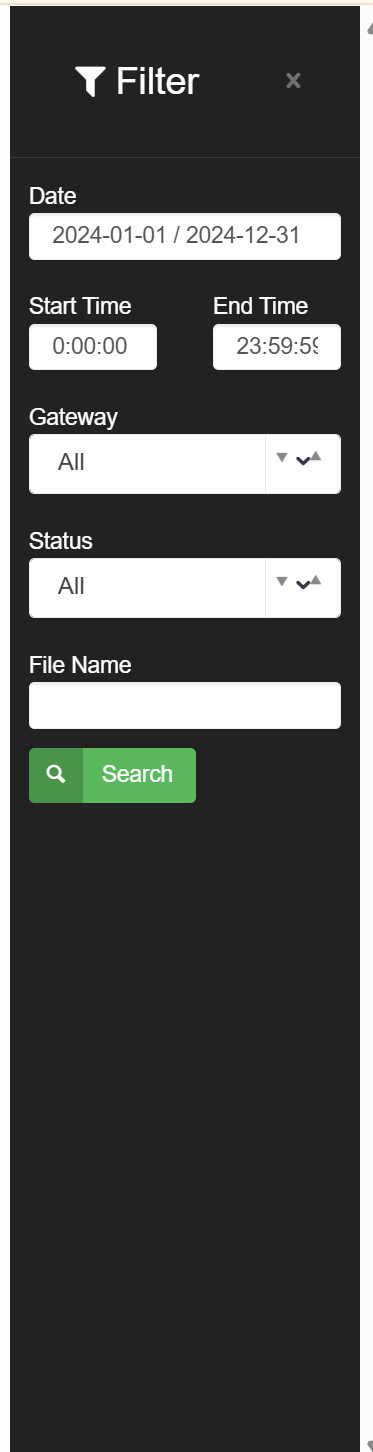
Use filters to search and narrow down files:
- Date – Filter by file date
- Gateway – Select from available company gateways
- Status – Choose from:
- Pending
- In Progress
- Success
- Failed
- File Name – Supports search
- Export Options
You can export the list (filtered or full) in the following formats:
- Excel (.xlsx)
- CSV (.csv)
- Reprocessing Warning Message
Before reprocessing, the system displays the following alert:
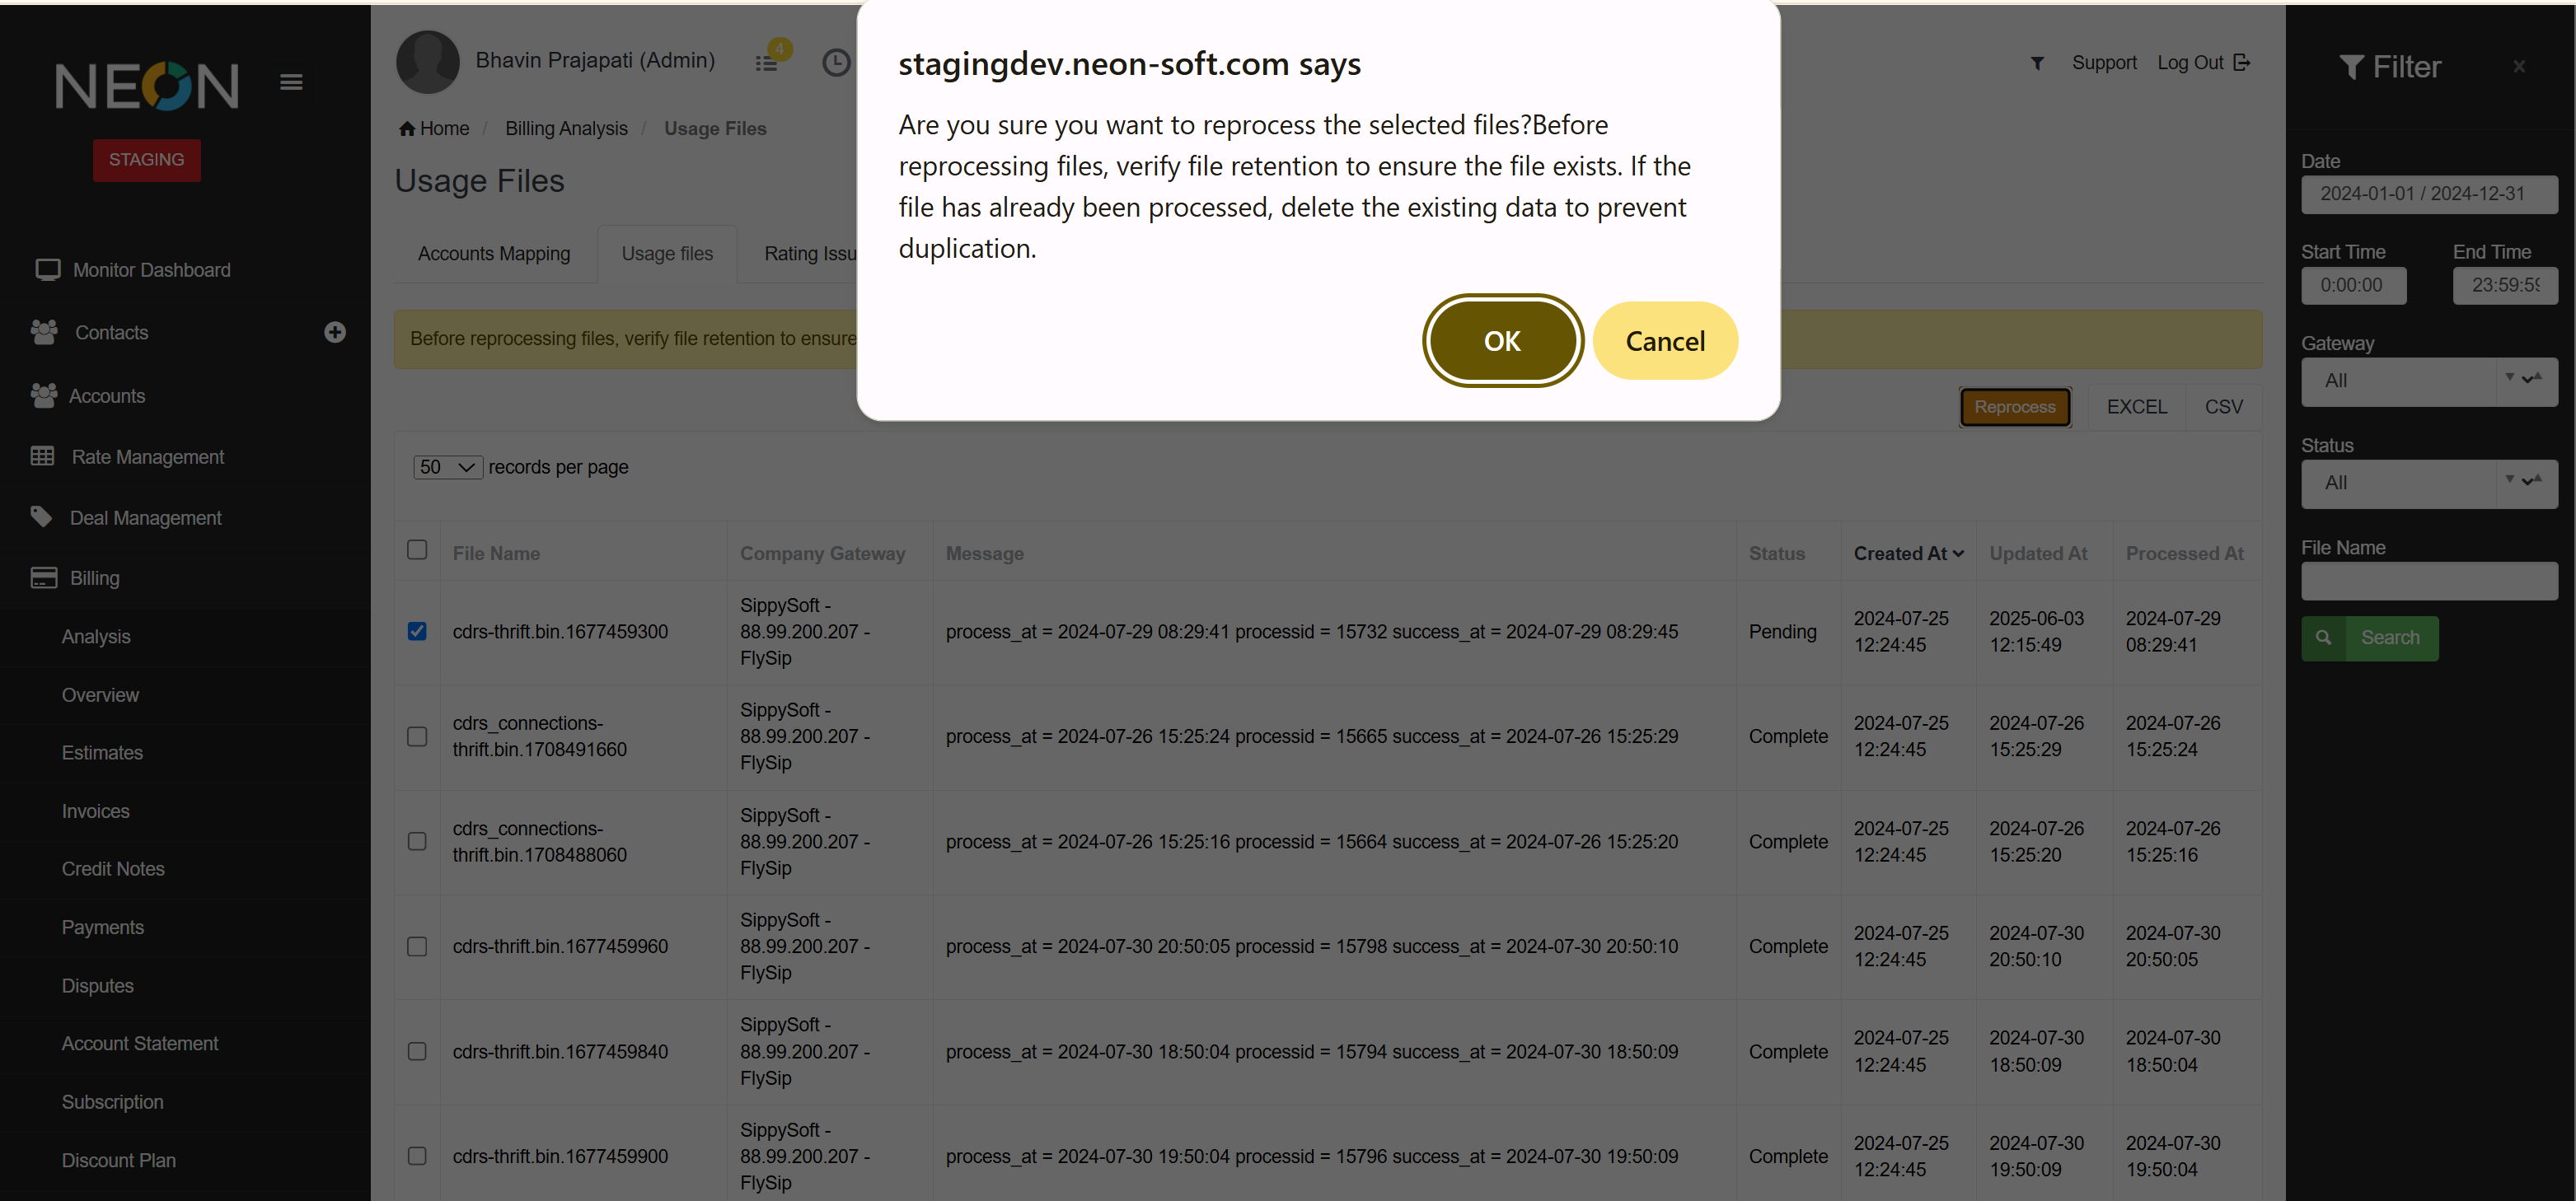
This ensures data integrity and prevents duplication.
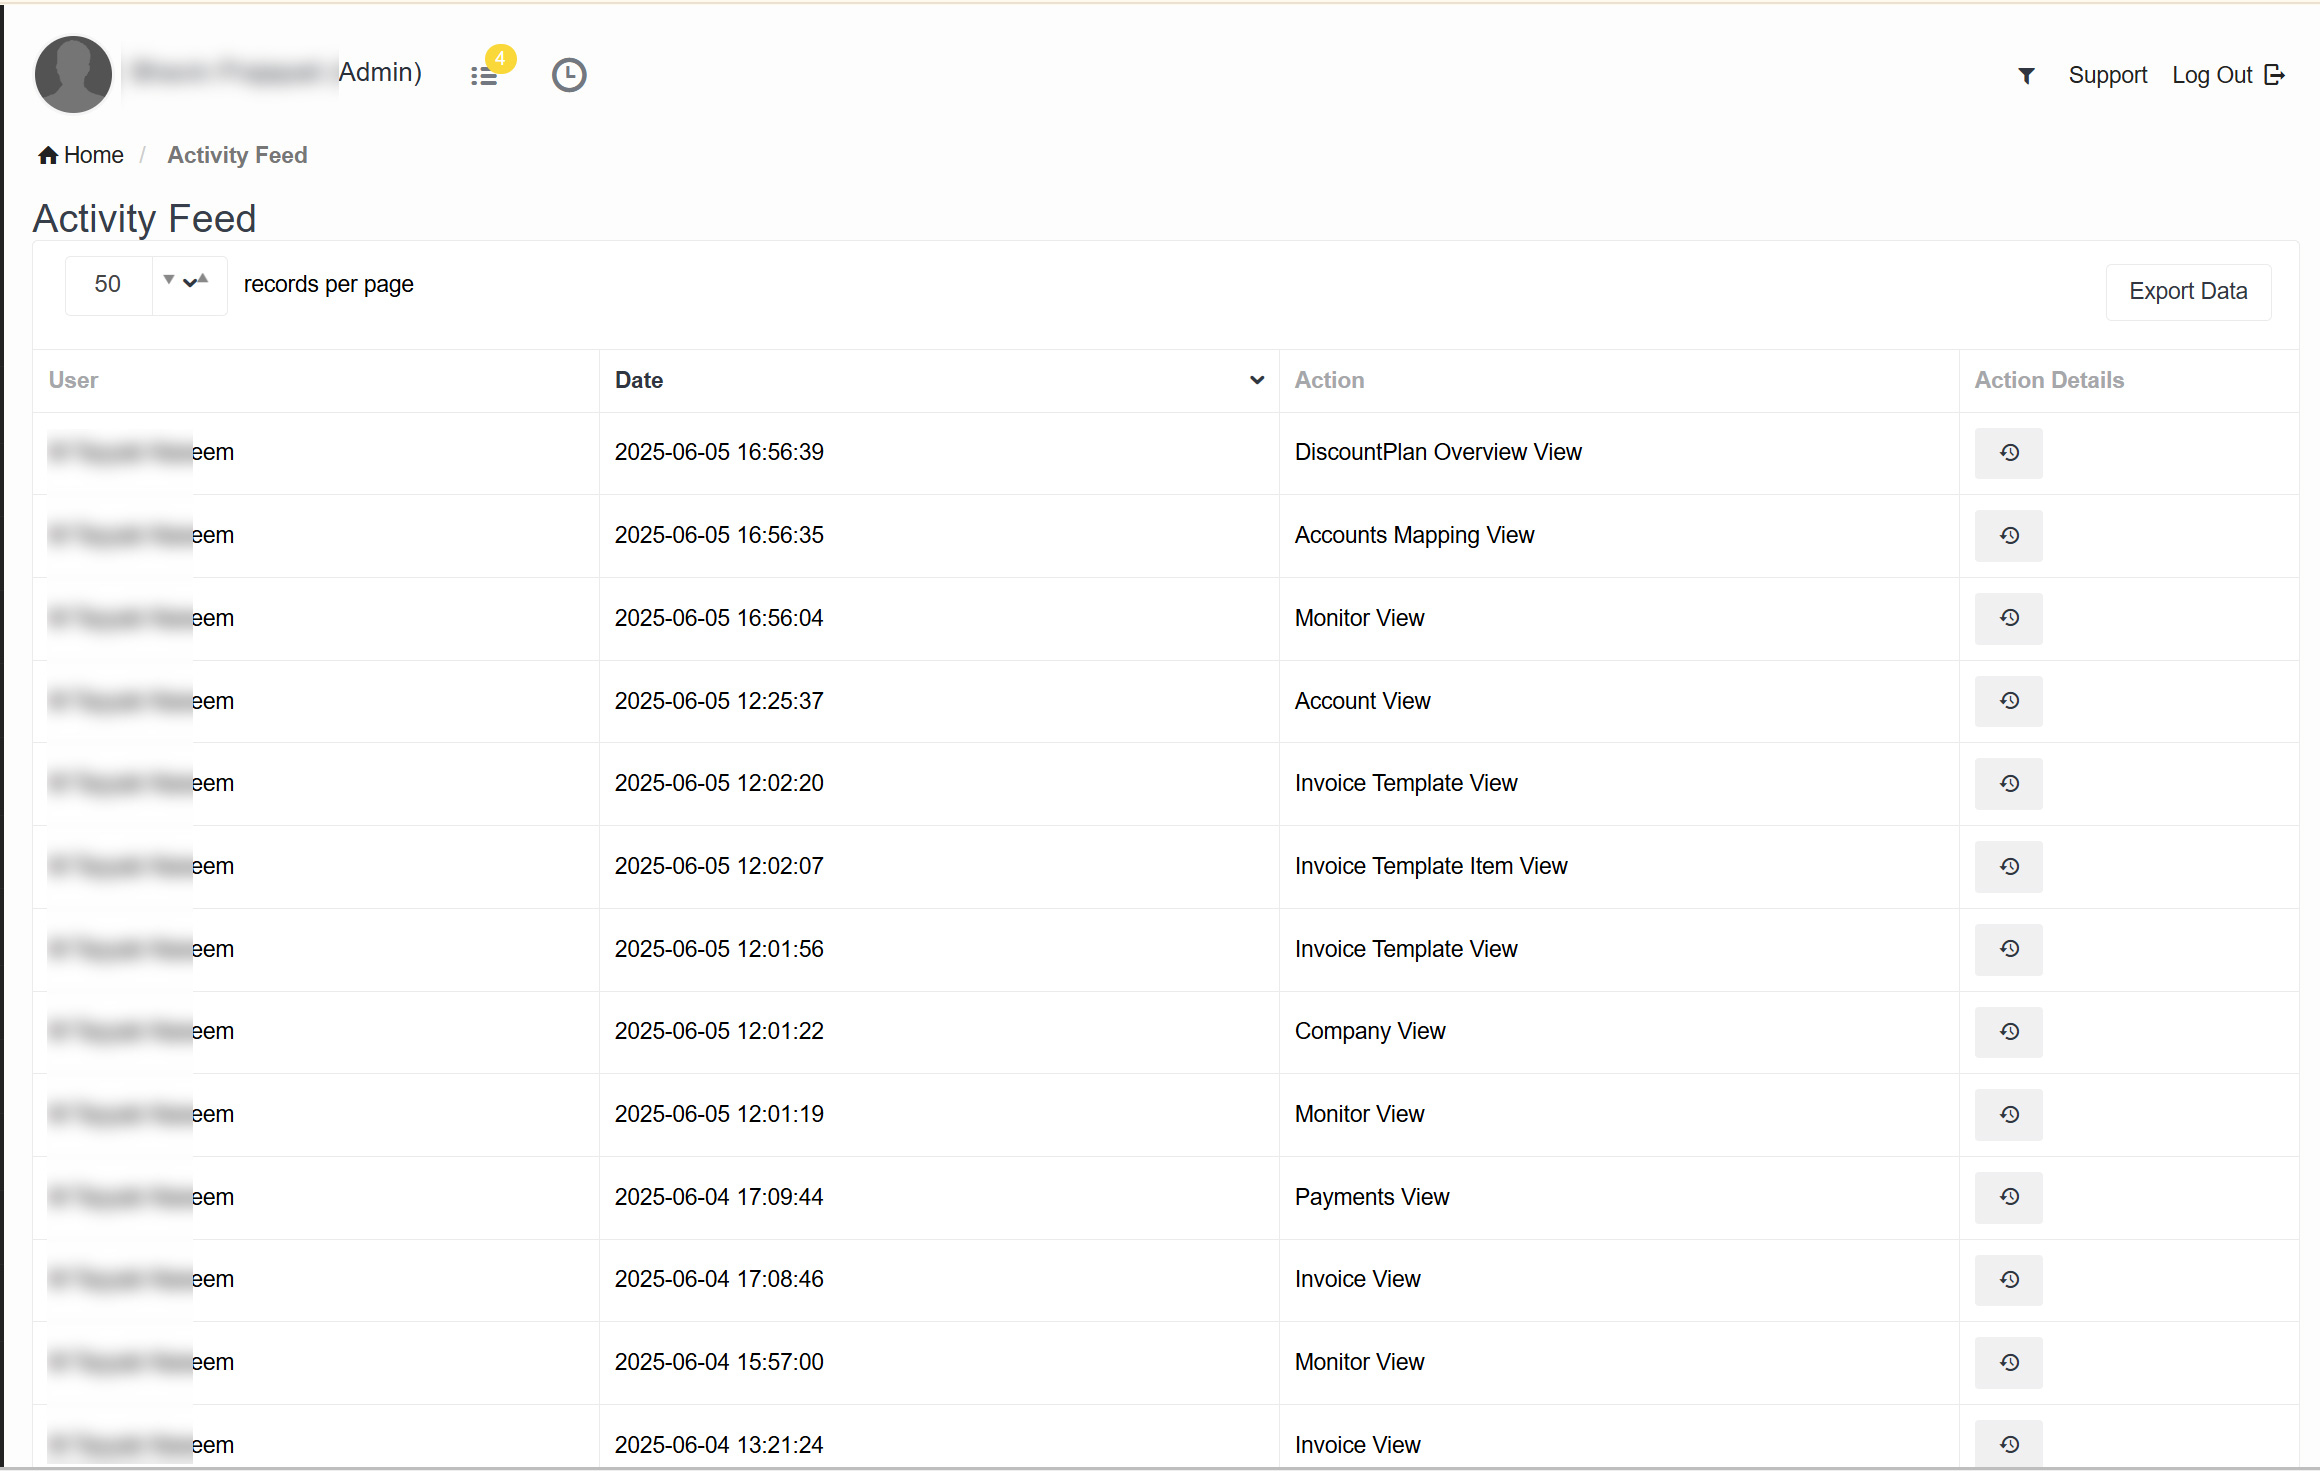
- Logs and Audit Trail
Every file reprocessing action is logged automatically in:
Admin → Activity Feed
On the Usage Files screen, introduce new functionality for file downloading, row highlighting, and improved visibility of processing details.
With this update:
- Users can directly download usage files by clicking the file name.
- Selected rows will be highlighted for better visibility and tracking.
Navigation Path
Billing → Overview → Usage Files
Feature Overview
- File Download
- On the Usage Files screen, each processed file appears in a list.
- The file name is now clickable.
- When the user clicks a file name, the system:
- Locates the file in the configured directory.
- Initiates the download in the same format as shown on-screen.
- If the file cannot be found, an error message appears:
“Unable to download the file. File not found.”
- Row Highlighting
- When a user selects a row, it will be highlighted to visually indicate the current selection.
- Only one row can be highlighted at a time to avoid confusion.

Rating Issues
Here you can see the all CDRs that are not rated.
To see a detailed analysis, click on the values and it will redirect you to the CDR page.
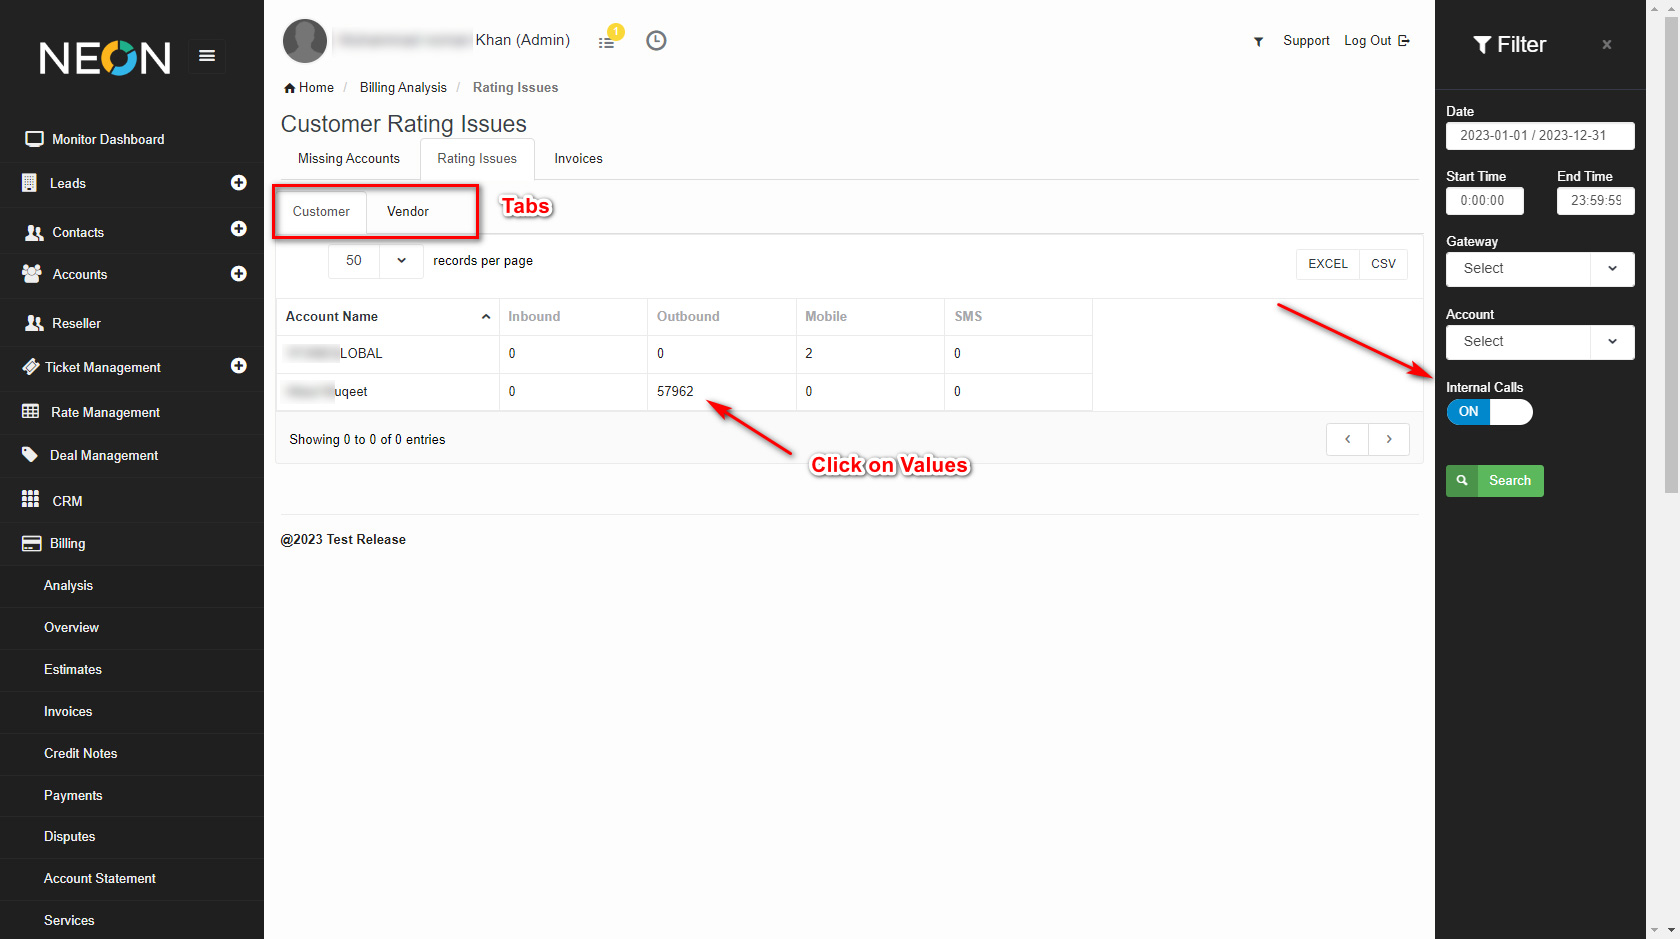
| Field | Description |
| Date | Please select the date |
| Start Time | Please select start time |
| End Time | Please select the end time |
| Account | Enter Account name |
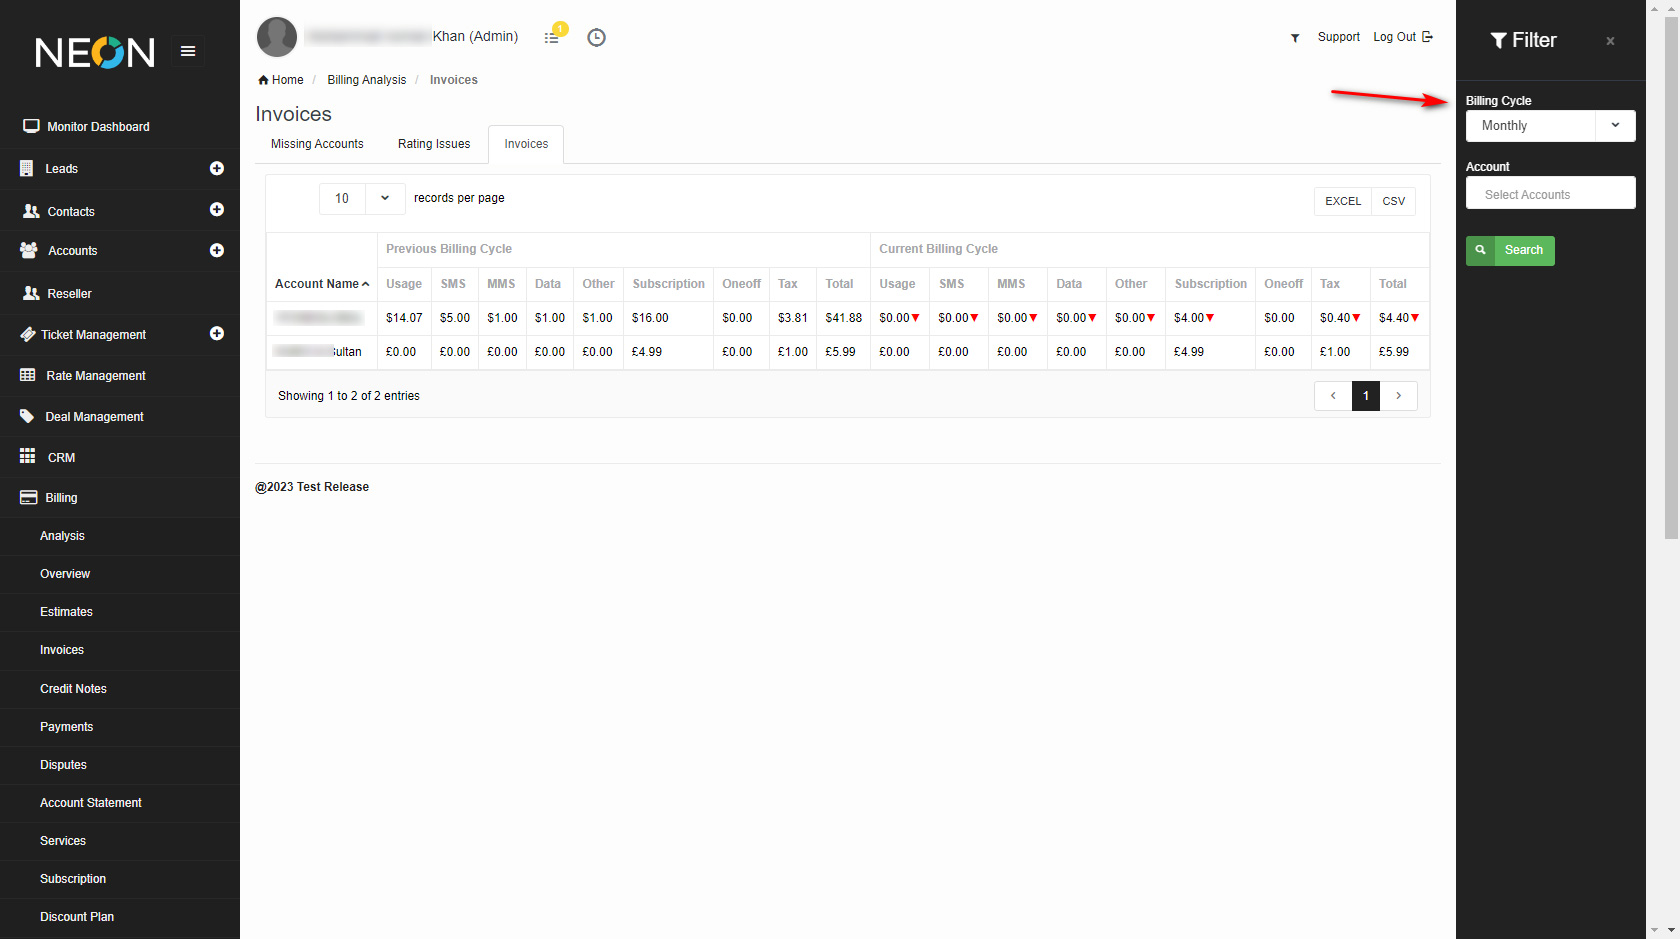
Invoices
Here you can compare Invoices between the previous and current billing cycle.
You can select the filter, and select your billing cycle, if you leave the accounts blank it will show you all the accounts.
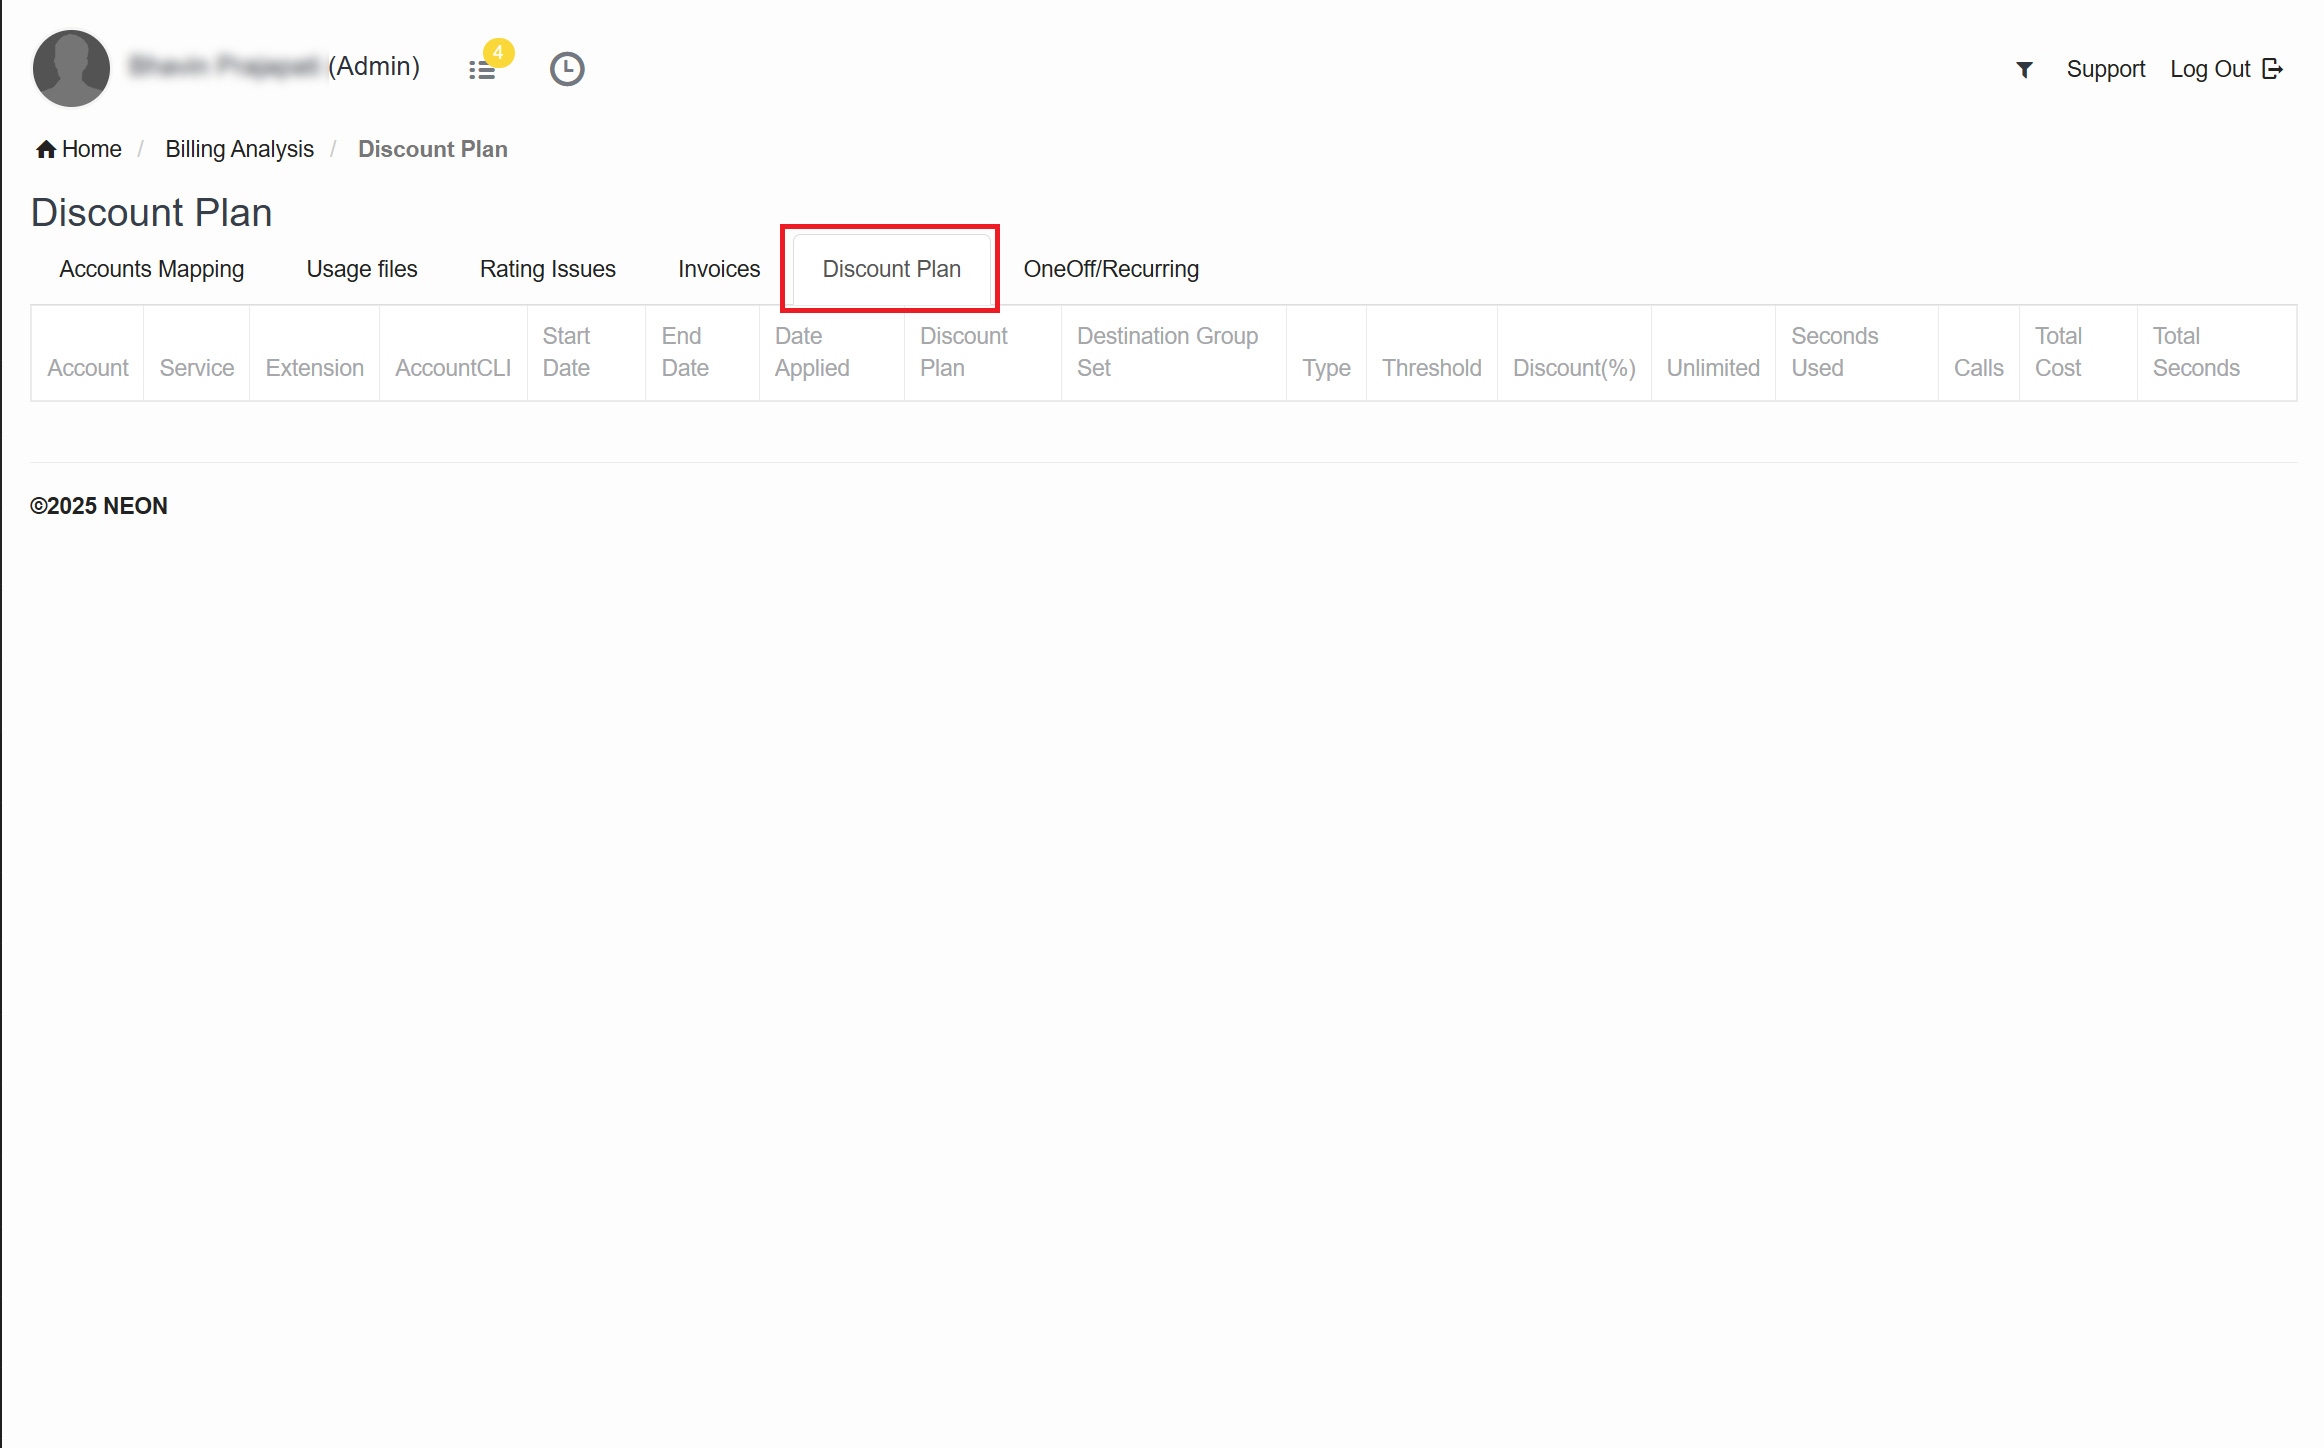
Discount Plan
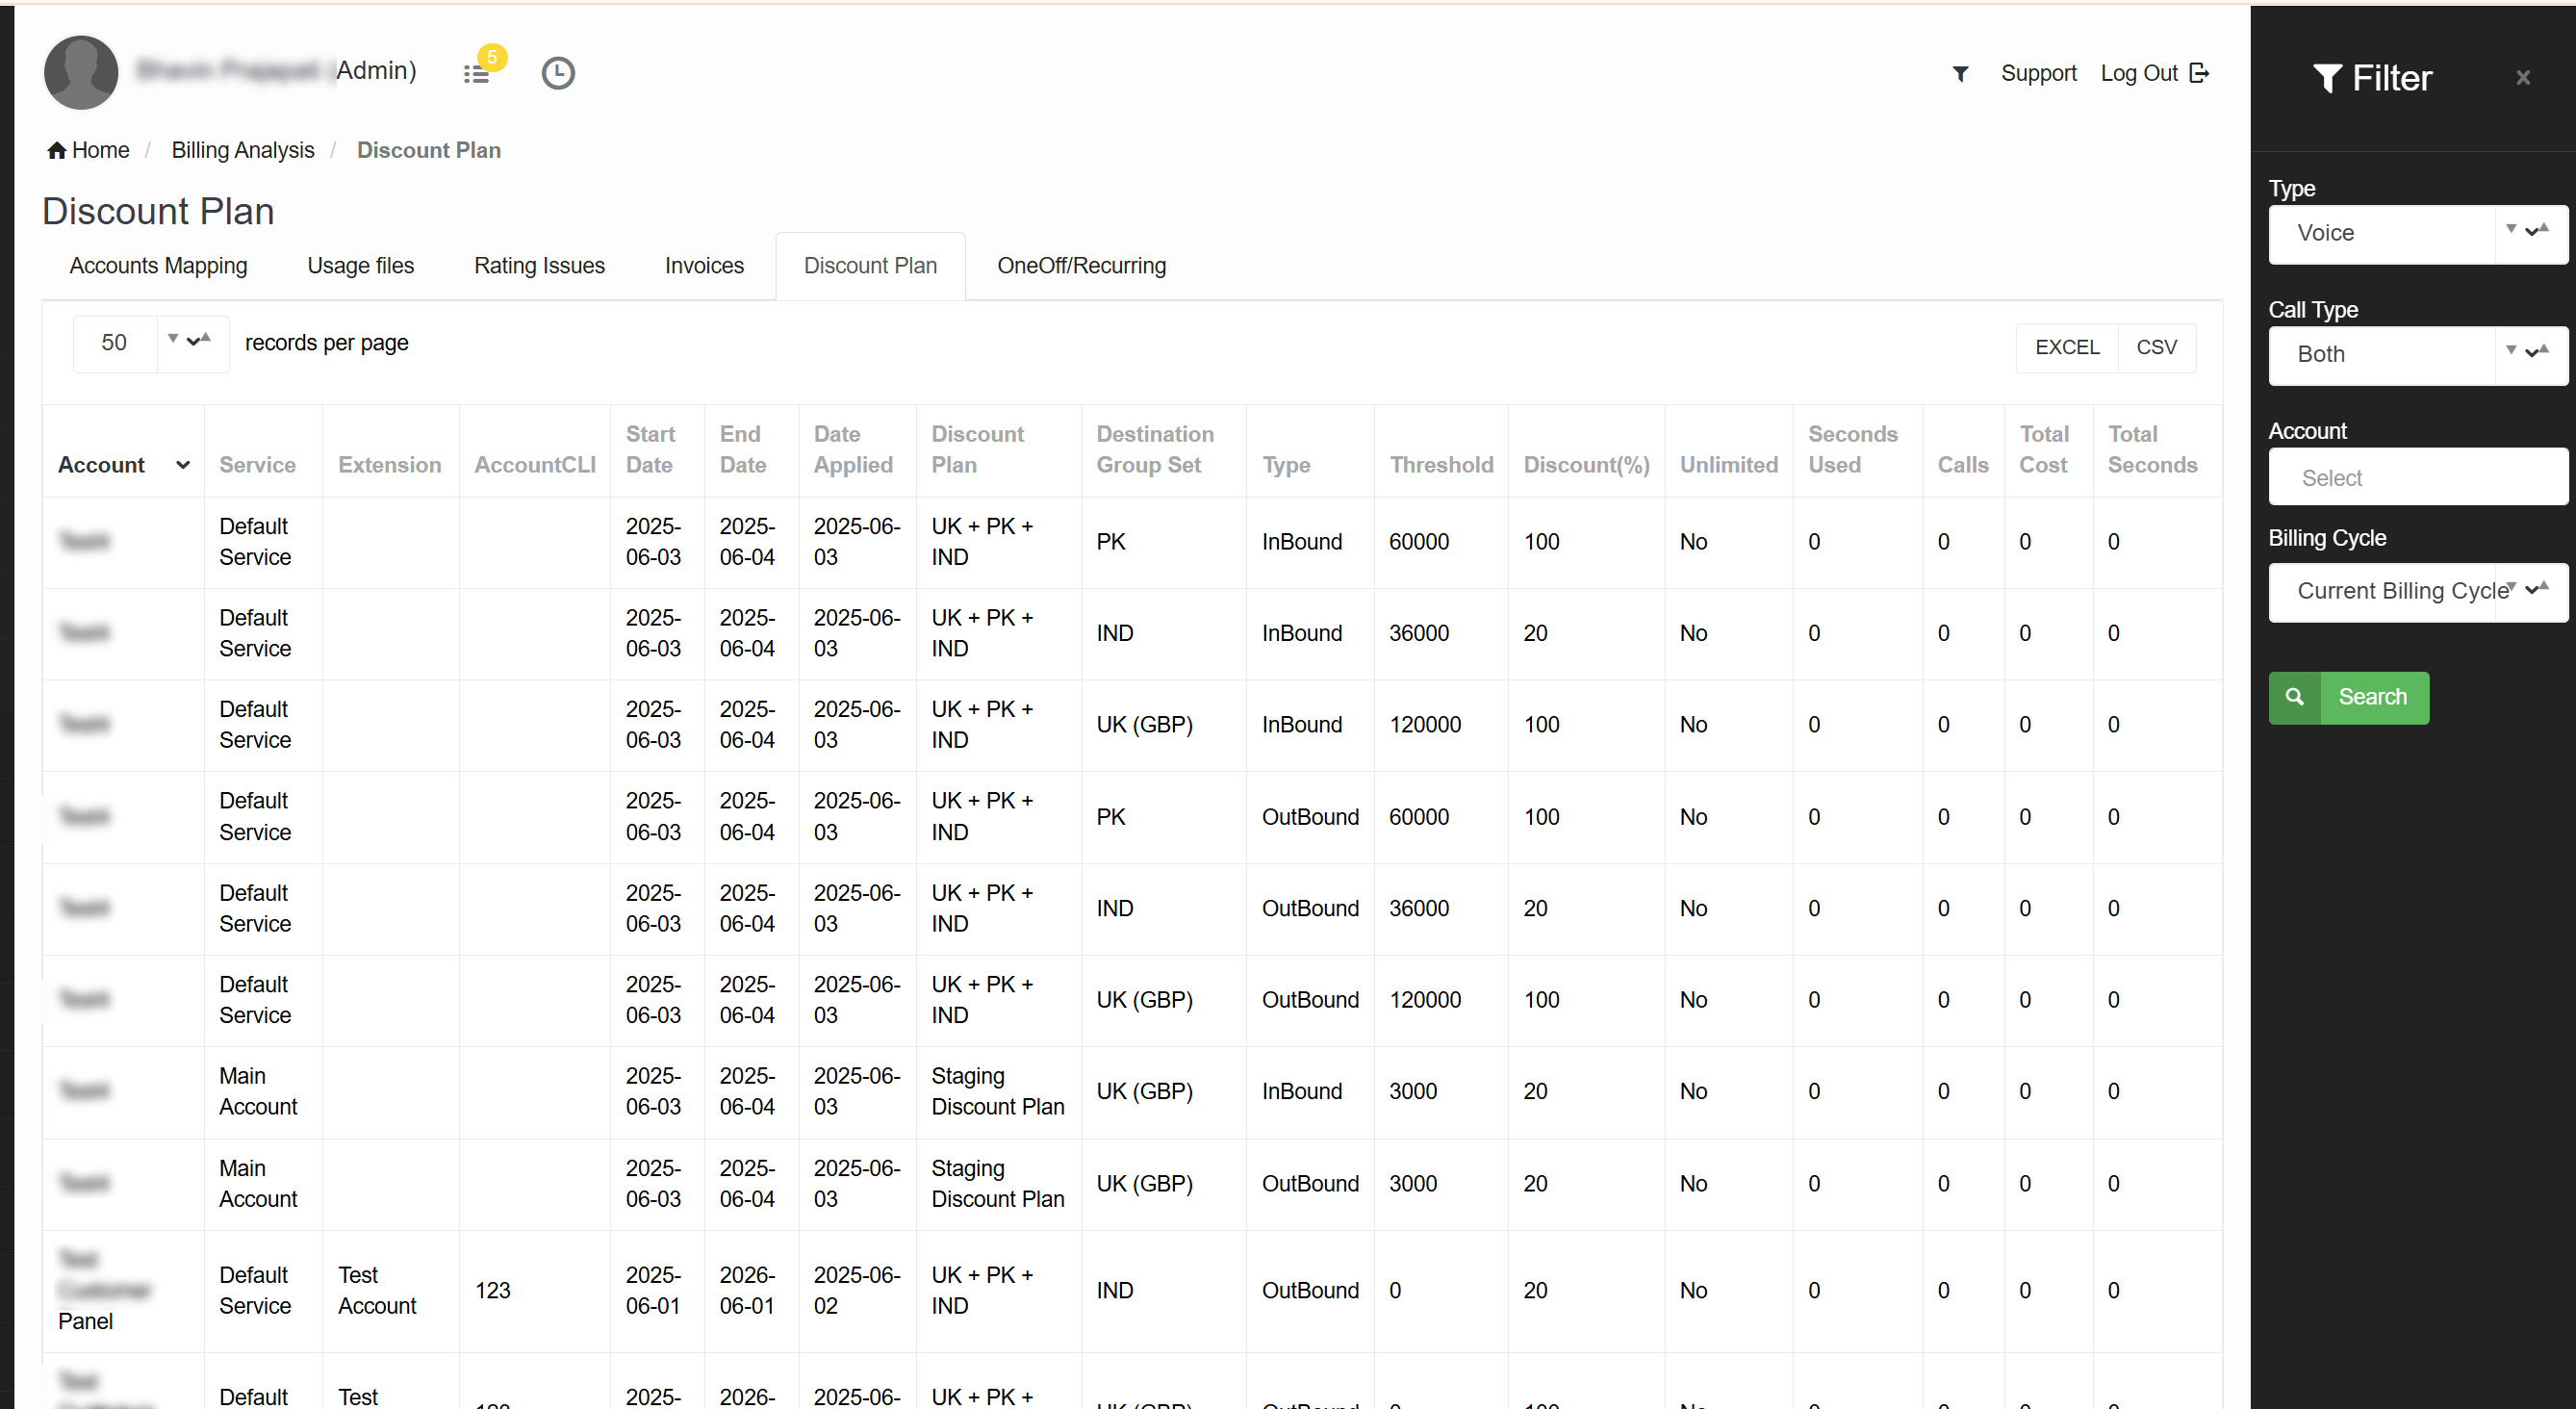
We have introduced a new Discount Plan feature in NEON, enabling you to apply specific discounts to accounts based on service types, call direction, and billing cycle preferences. This feature enhances flexibility in billing and supports targeted pricing strategies.
To View the Discount Plan
To view a discount plan to any customer account, follow the steps below:
- Login to your NEON account, and from the left sidebar menu, click on the Billing button. In Billing, and click on the Overview to open the edit view.
- Now please click on the Discount plan tab
Applying Discount Plan Settings
In the Discount section of the Services tab, you can configure the discount as follows:

| Field | Description |
| Service Type | Choose whether the discount applies to Voice or SMS traffic. |
| Call Type | Select if the discount is for Inbound or Outbound calls or both. |
| Account | We can select accounts to see if the discount is applied or not. |
| Billing Cycle | Decide if the discount is applied to the Current or Previous Billing Cycle. |
Please ensure all configurations are properly set, then click Search to filter the Discount Plan to the account.
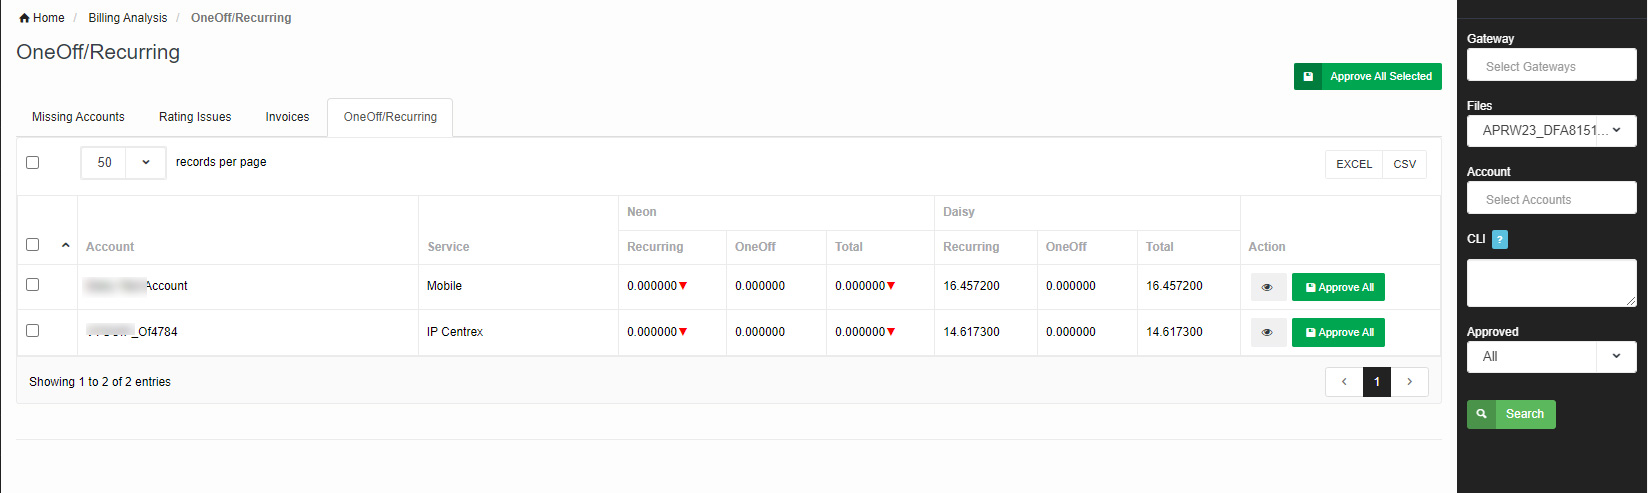
One/Off Recurring
Here you can compare one off and recurring charges per month Giacom is charging you and what you are charging your customers. Select the File Name from the filter section and click on Search. Data from the file will be loaded. Once you have compared the data, you can approve the data by clicking on the Approve green button. Click on the eye icon to view the breakdown.