
Rate Tables
NEON lets you create unlimited rate tables. You can assign rate tables to any number of customers. This provides a single point of maintenance for many customers' rates, though you can also easily override them in cases of negotiated discounts.
1) Add Rate Table
Here you can add your voice or mobile rate table. Please go to Rate Management > Rate Table.
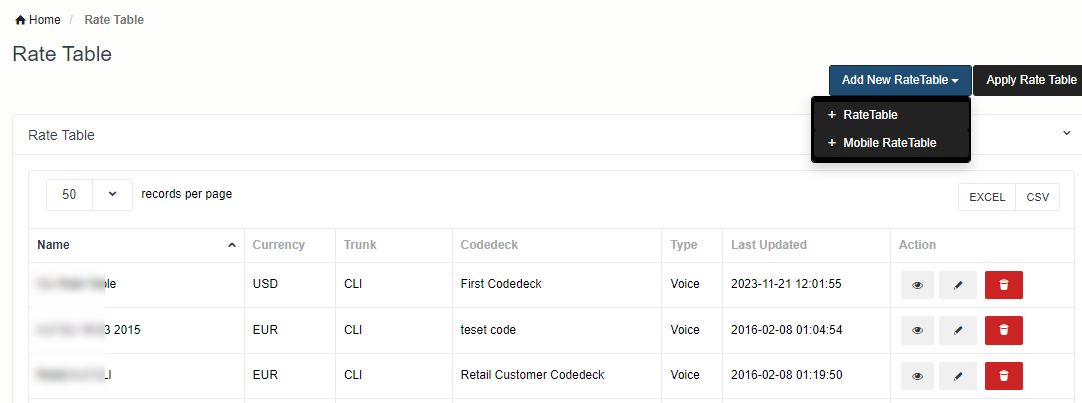
Fill the required fields and click on the save button
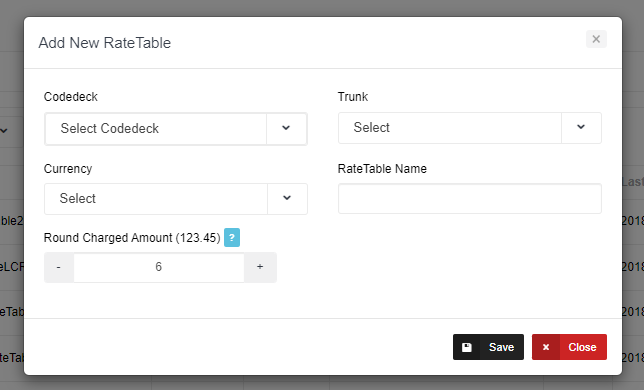
| Field | Description |
| Codedeck | codedeck is list of destination sets, you can set your codedeck from settings -> codedeck |
| Trunk | optional |
| Currency | default currency for a rate table |
| Rate Table Name | name of a rate table |
| Round Charge Amount |
it's round up the value to given decimal points. Ex: you have entered 2 in Round Charged Amount then it will round the CDR amount like this : amount is 1.2355 becomes 1.24. Note that rounding off is always done upwards.
If you don't want rounding then keep default value 6. |
2) Upload Rates
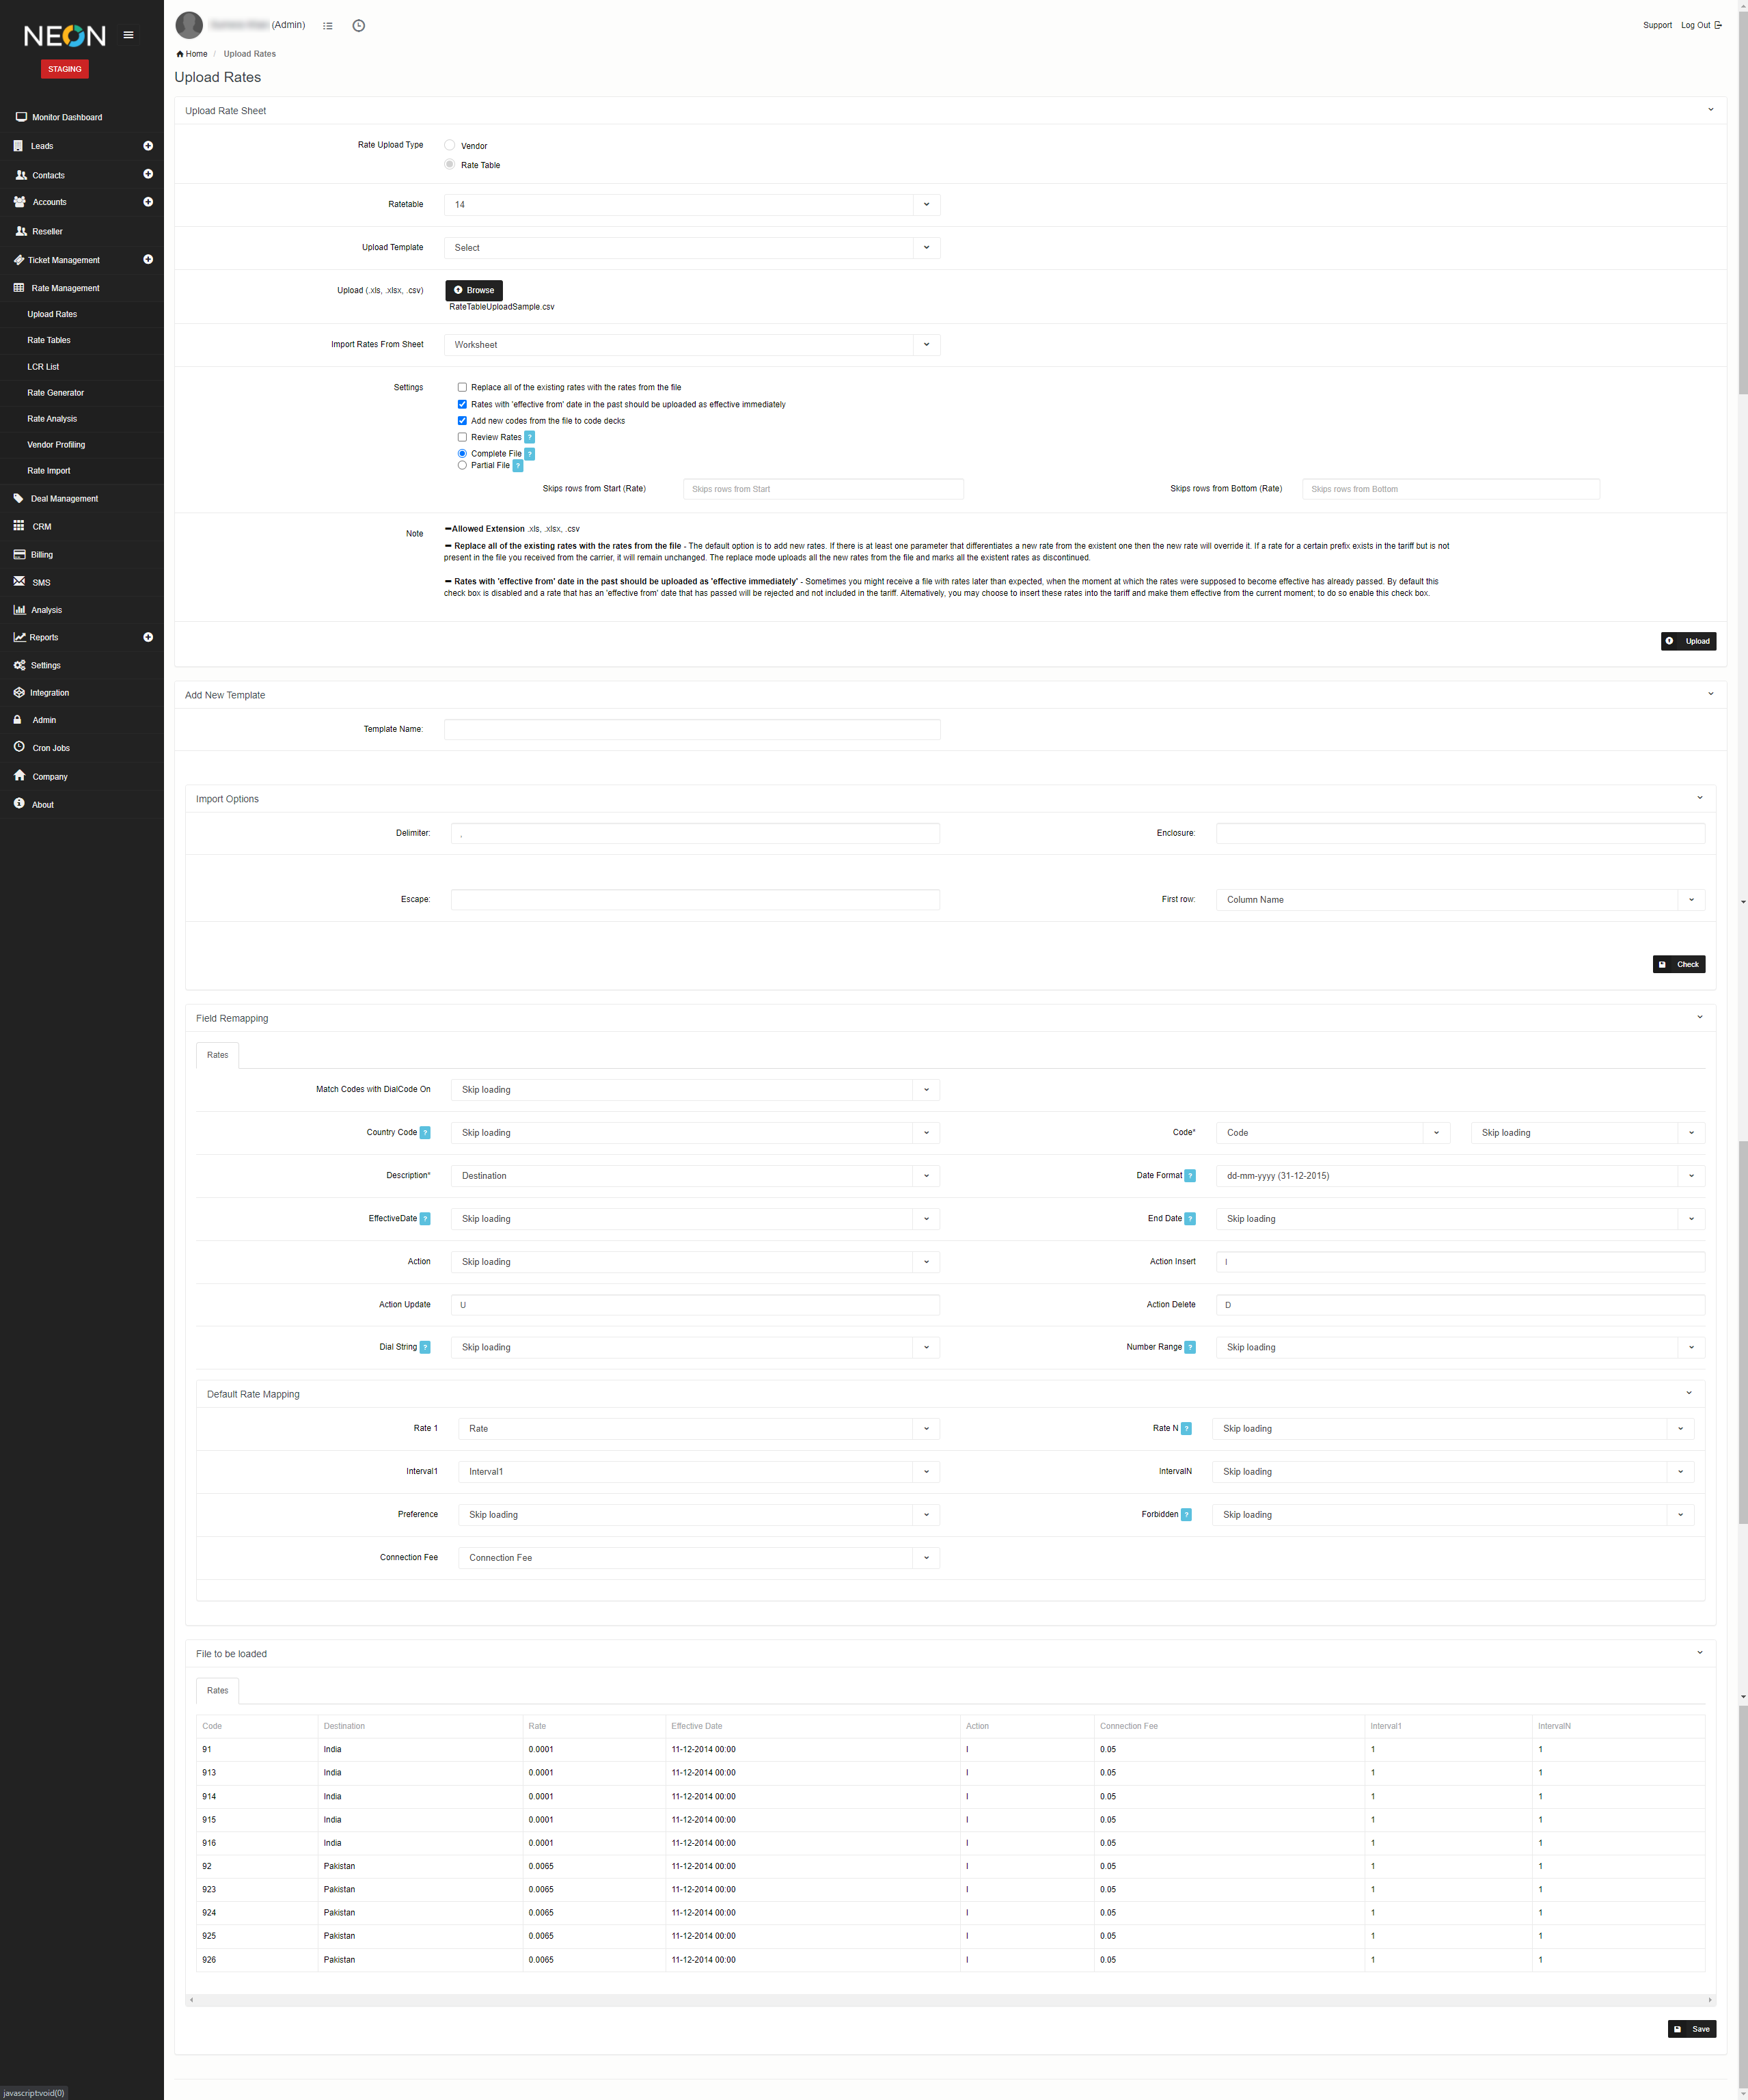
You can upload rates from Rate Management-> Upload Rates
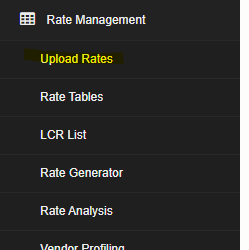
Then upload your rate file and map your columns from excel/csv
3) Apply Rate Table
You can apply the rate table to Trunks or Service by clicking on the Apply Ratetable button. Use the Trunk option if your setup is wholesale otherwise, use the Service option.
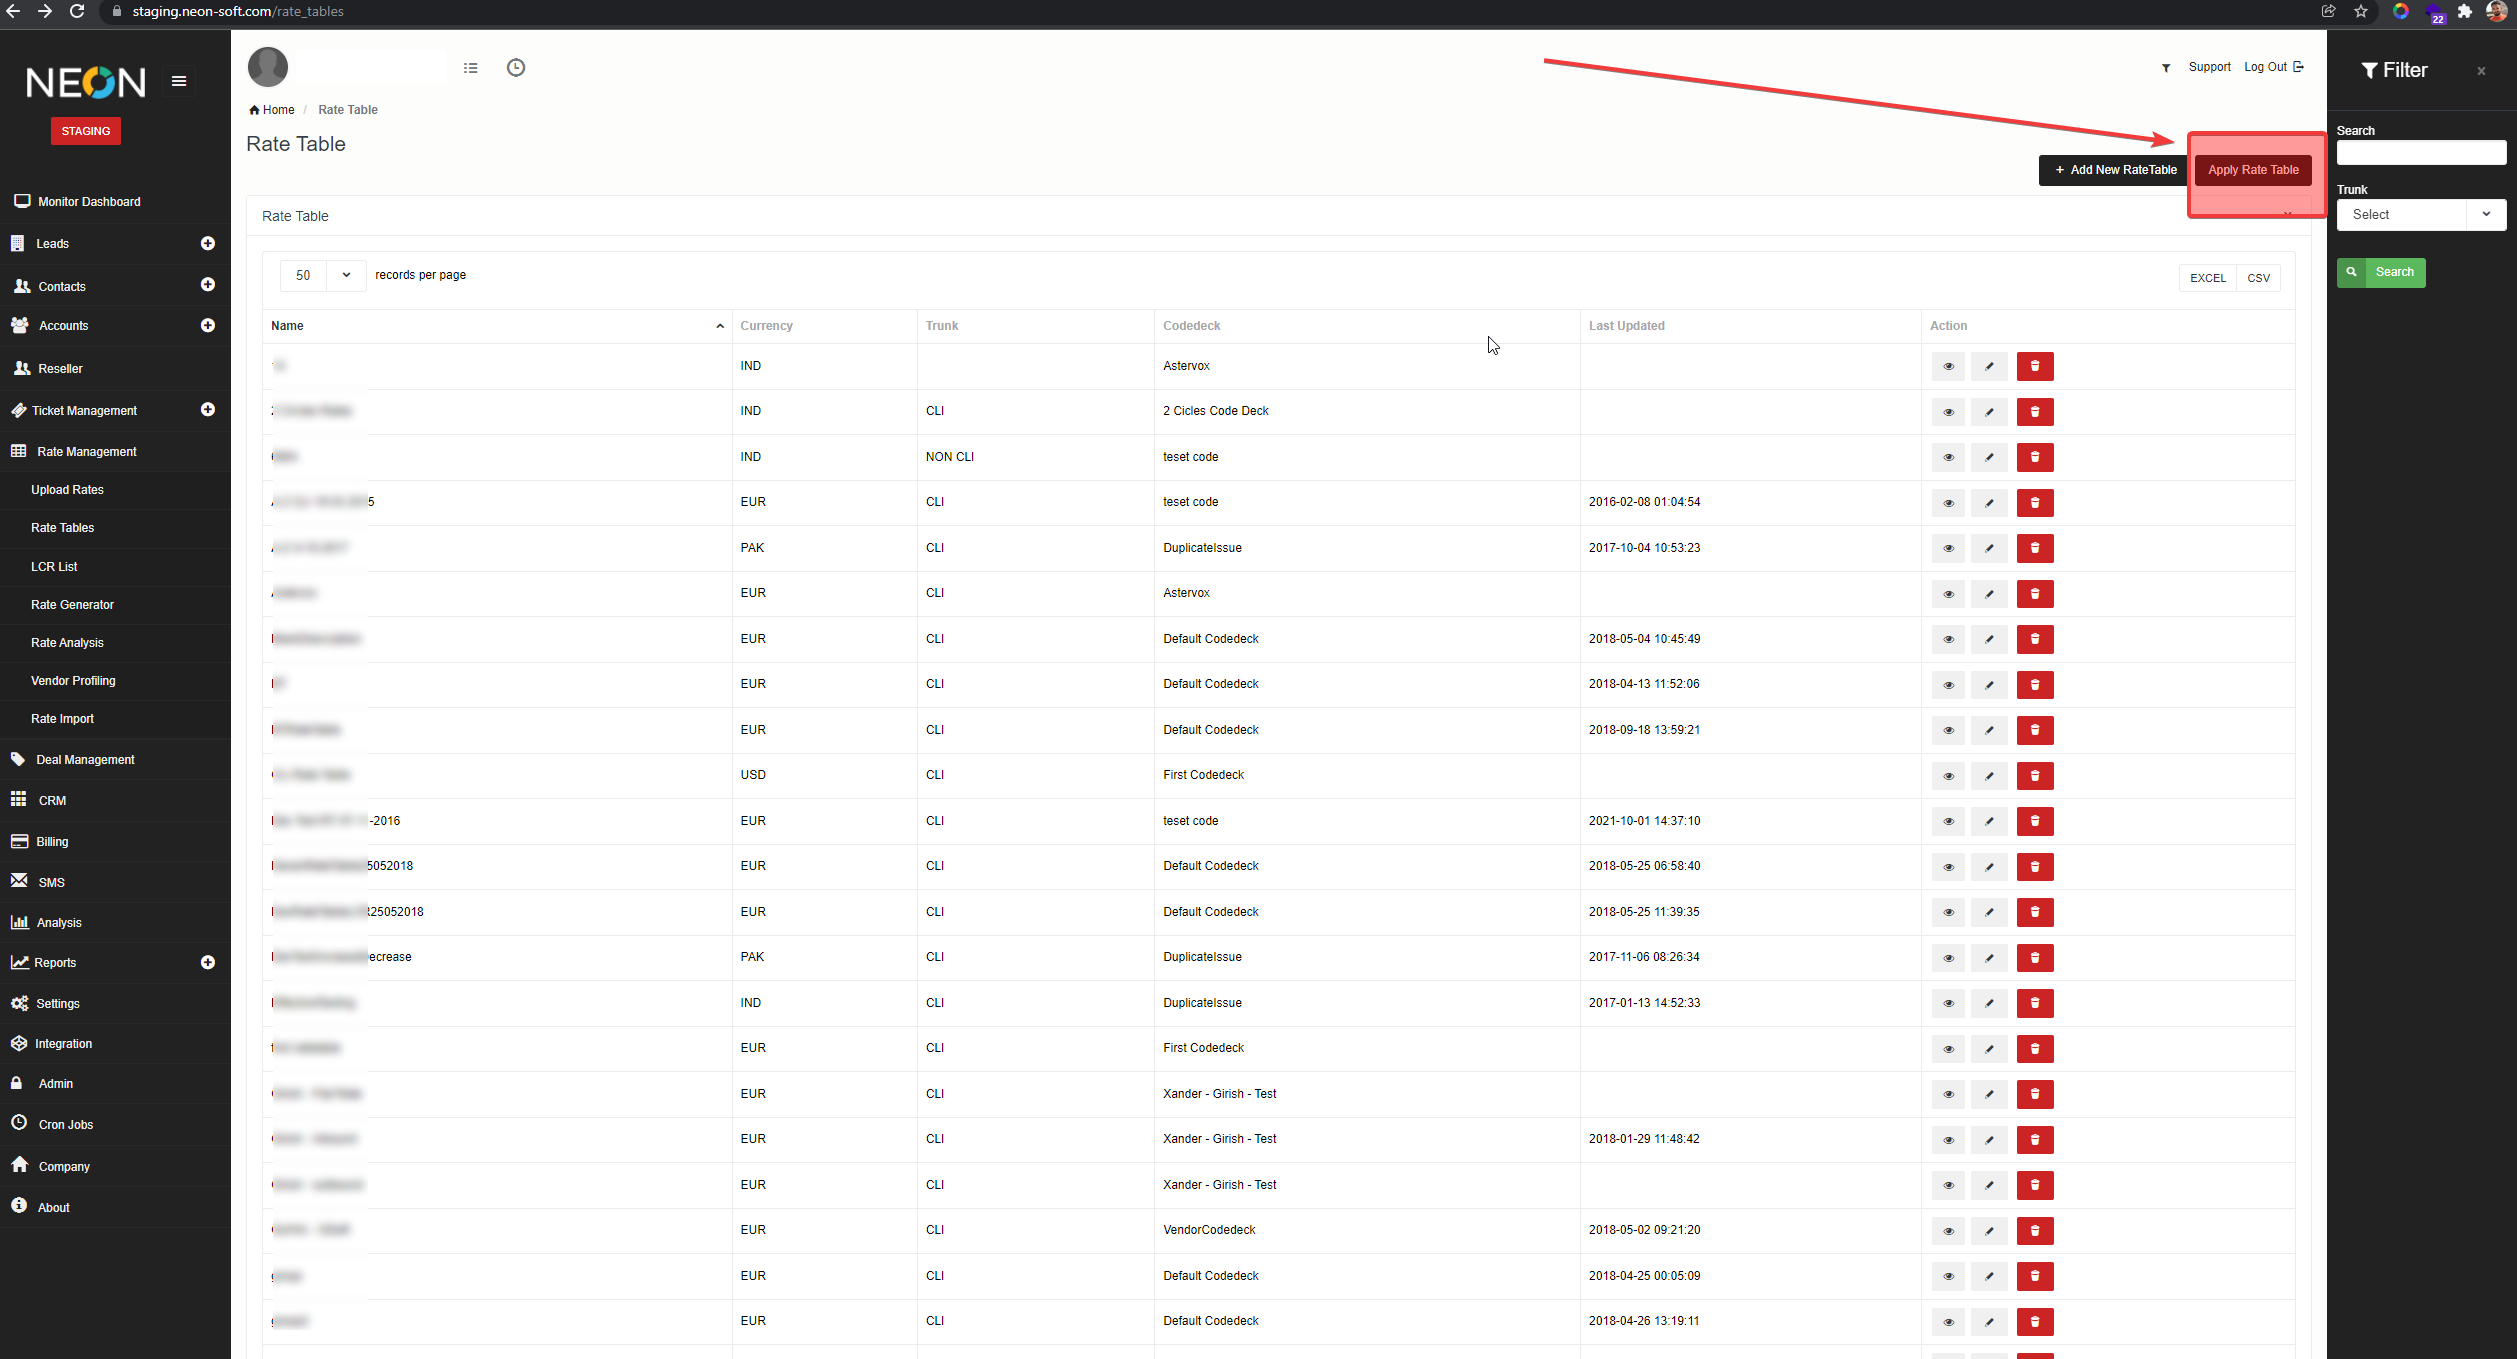
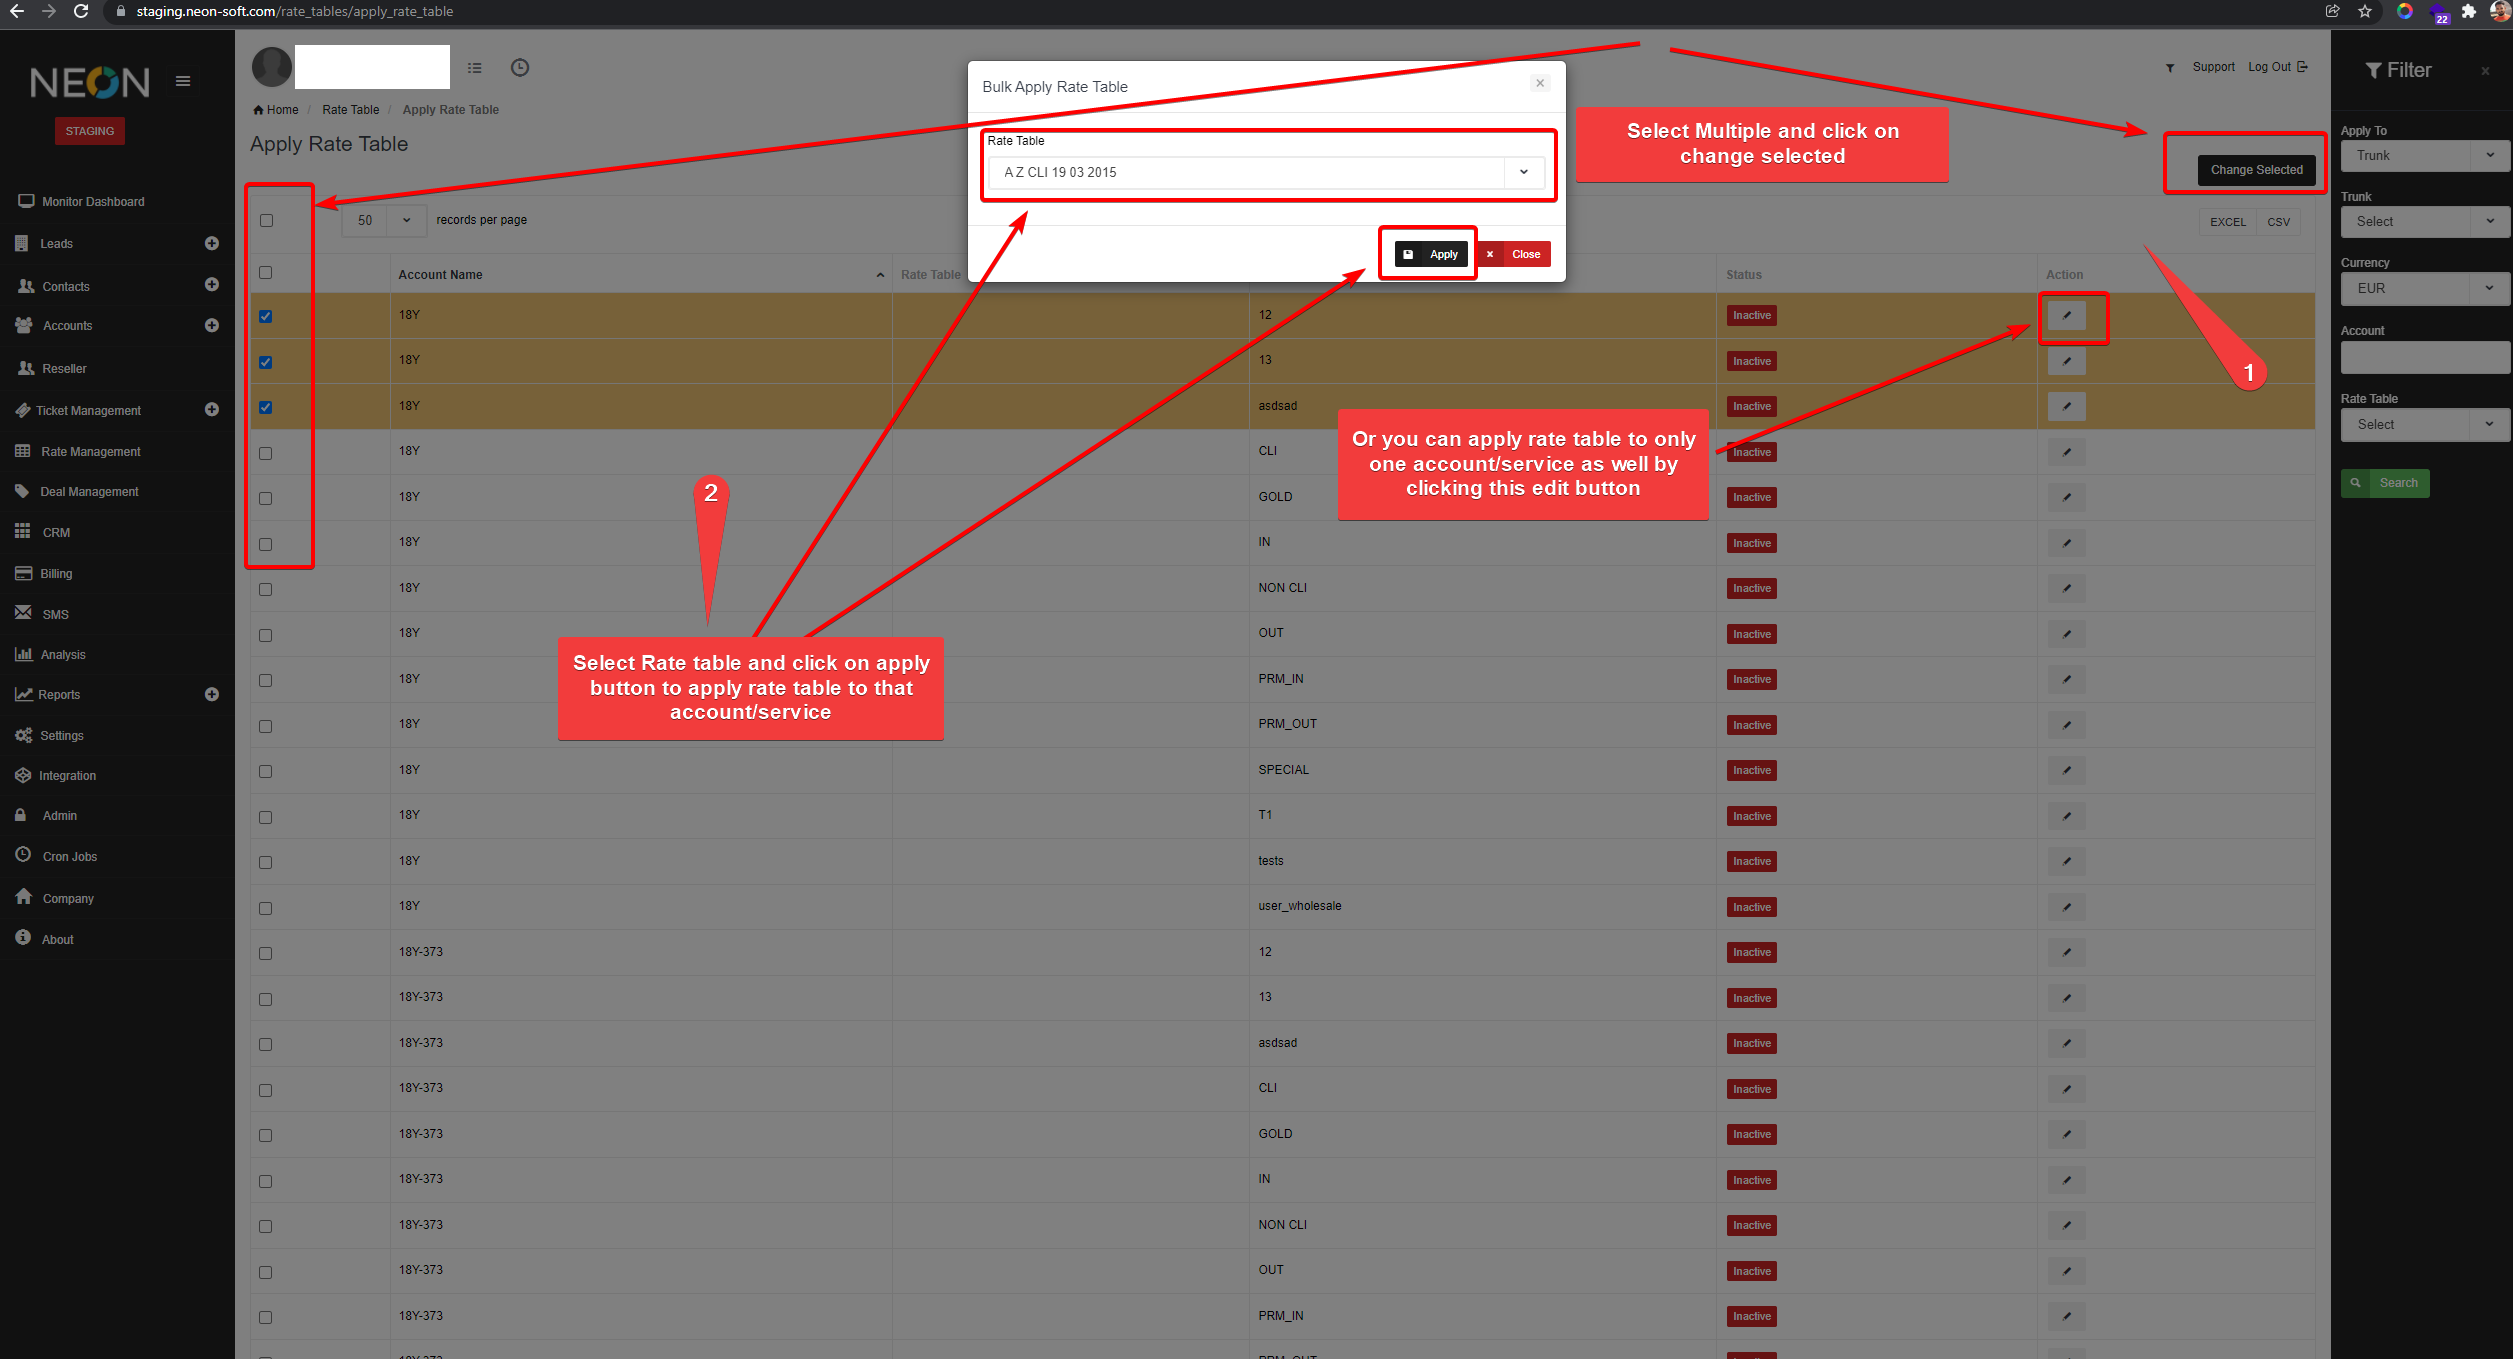
Click on Edit button to apply rate table to any single account/service or you can also select multiple account/service and click on apply selected button to apply on multiple account/service. then select Ratetable on the popup and click on Apply button.
4) New Offer Selected
The New Offer Selected feature allows you to schedule new, future-dated rates for selected destinations without overwriting or deleting your existing rate history.
Overview & Purpose
- Purpose: To offer updated rates that take effect on a specified future date.
- Key Benefit: Creates a new future-dated entry while keeping all historical rate data intact.
1.Navigate to Rate Table:
Go to Rate Management > Rate Tables and select the relevant rate table (e.g., Store Prepaid).
2.Filter and Select Rates:
Use the search filter to find your target destinations. Select the checkbox next to the specific rate entries you want to update.
3.Click 'New Offer Selected':
From the top action bar on the Rate Table screen, click the New Offer Selected button to open the modal dialog.
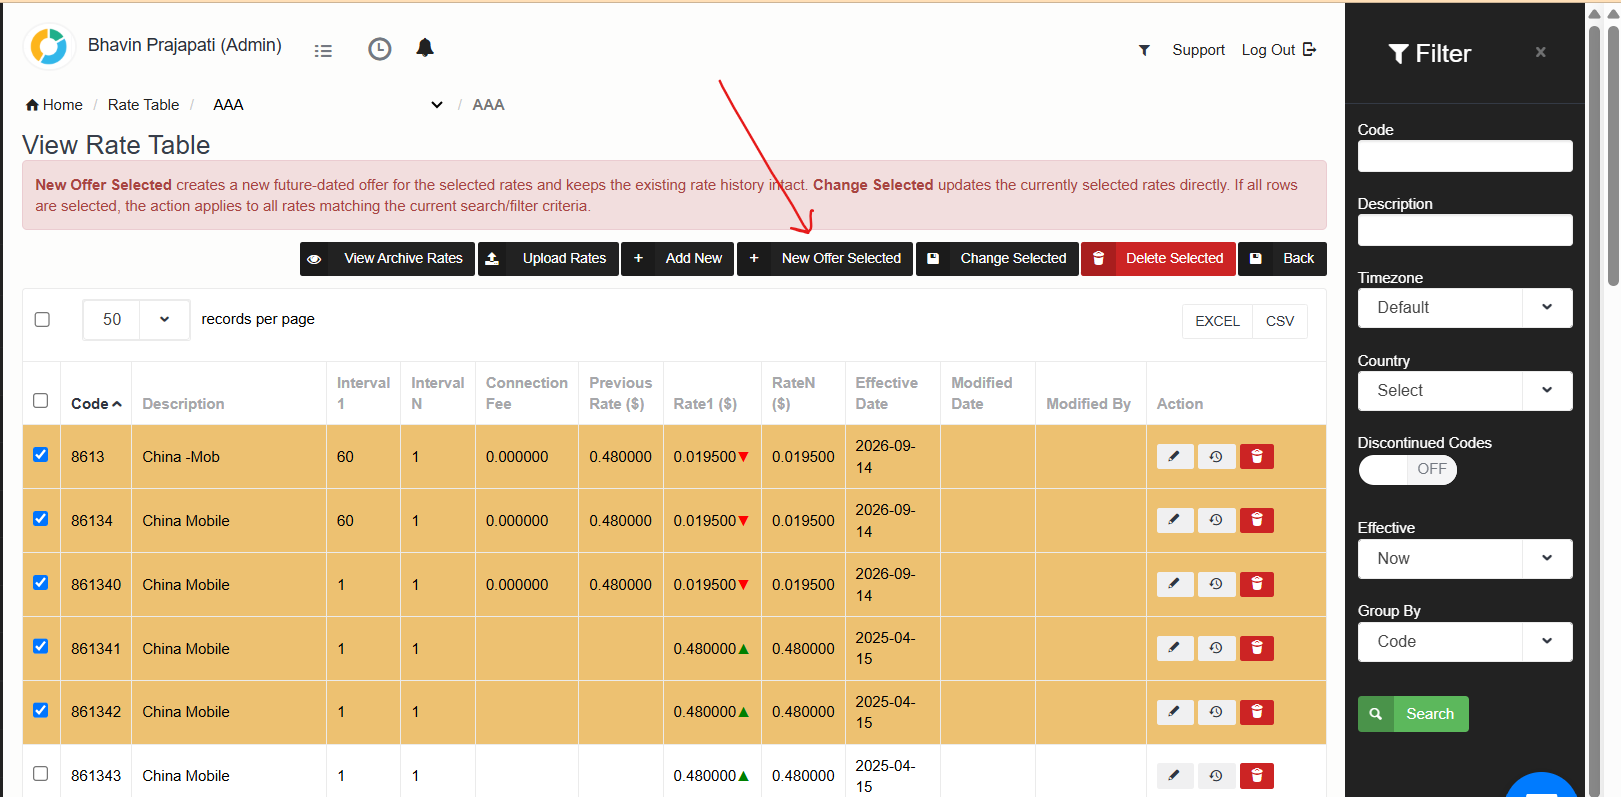
4.Configure Future Date & New Rates:
In the popup modal:
- Select an Effective Date (must be a future date).
- Enter the New Rate value (and any applicable Connection Fees or Intervals).
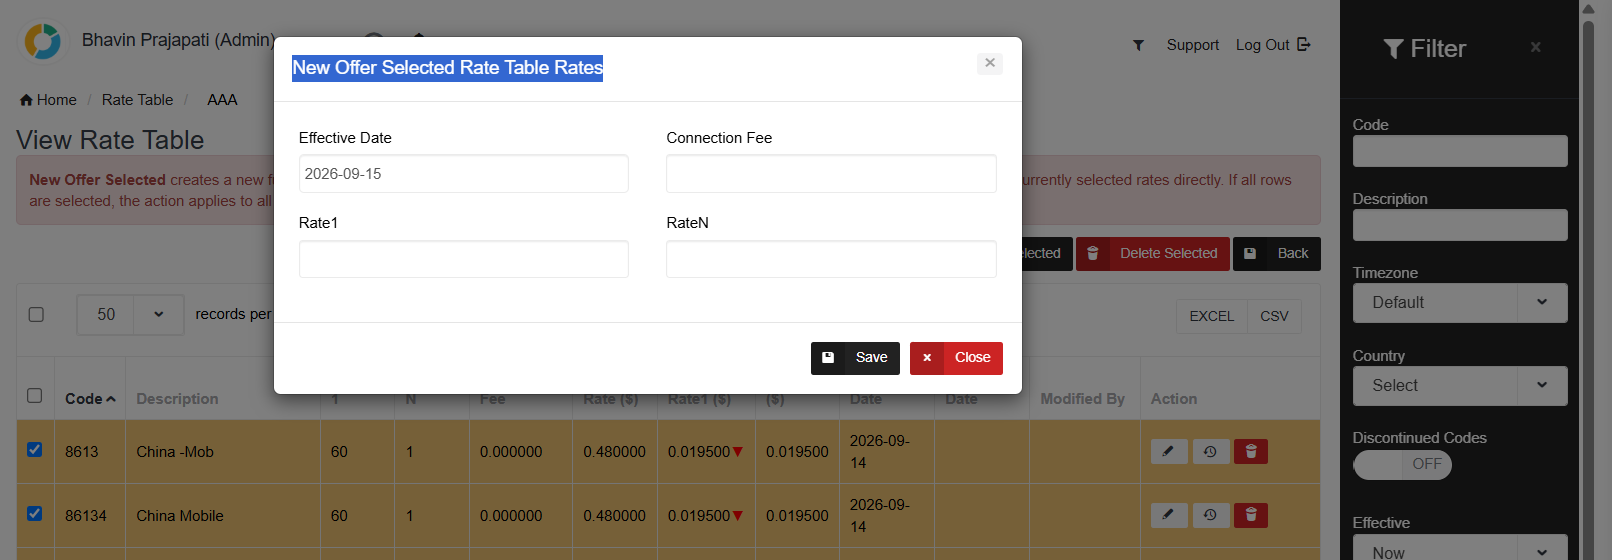
5.Save and Verify:
Click Save. Verify that a new entry with the updated rate and future effective date appears in your table alongside the previous rate entries.
5) Rate Fields
Voice Rate Table
| Field | Description |
| Code | Destination code |
| Effective Date | Rate Effective from |
| Rate1 | Rate for first interval |
| RateN | Rate for N interval |
| Connection Fee | fee you want to charge as soon as call gets connected, if you don't want to then keep it 0. |
| Interval1 | If you are doing per second billing then enter 1 and if you are doing per minute billing then enter 60 |
| IntervalN | After first Interval how you want to charge, if per second then enter 1 and if you are doing per minute billing then enter 60. |
| Timezone | Time of a call, if you are using peak off-peak rates. if not then select default. |
Mobile Rate Table
| Field | Description |
| Code | Charge code |
| Effective Date | Rate Effective from |
| Rate Type | You can add rates in three forms (Fixed Rate , Percentage or Rate) |
| Rate | Rate Value |
| Category | Type of code (SMS,MMS,Usage,Data) |
| Timezone | Time of a call, if you are using peak off-peak rates. if not then select default. |