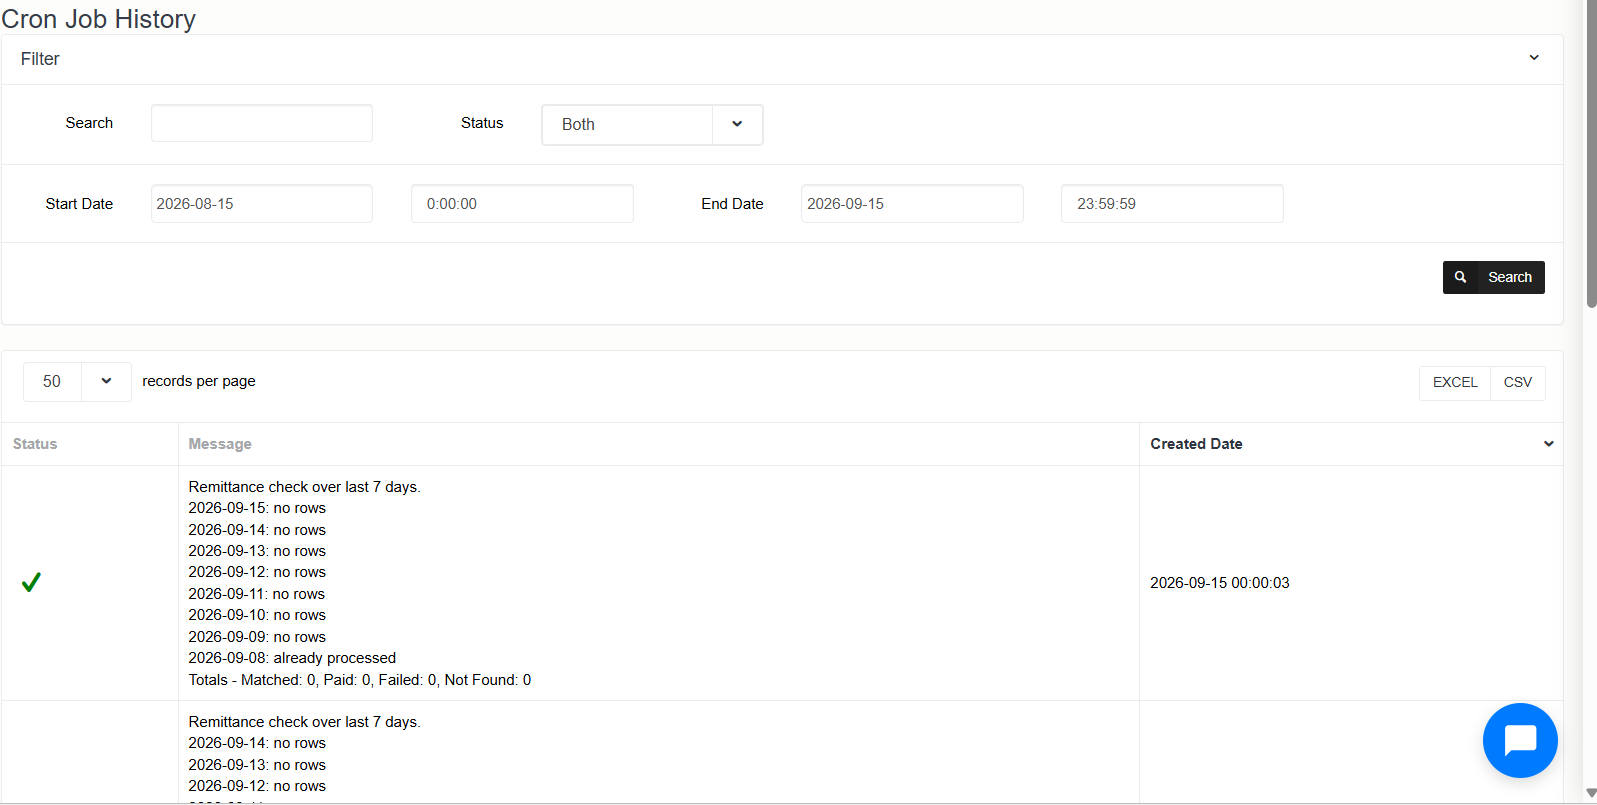
FastPay
The FastPay payment integration in NEON automates direct debit processing and invoice status updates. Below is the step-by-step setup and operational workflow.
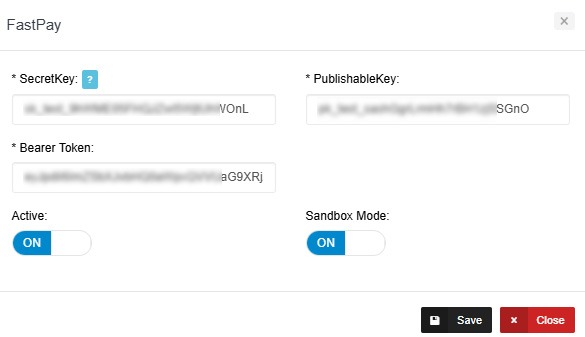
1.Configure Integration Credentials:
Go to Integration Settings and select FastPay. Enter your Secret Key, Publishable Key, and Token. Enable Sandbox Mode for testing, or turn it off for live transactions. Save the configuration.
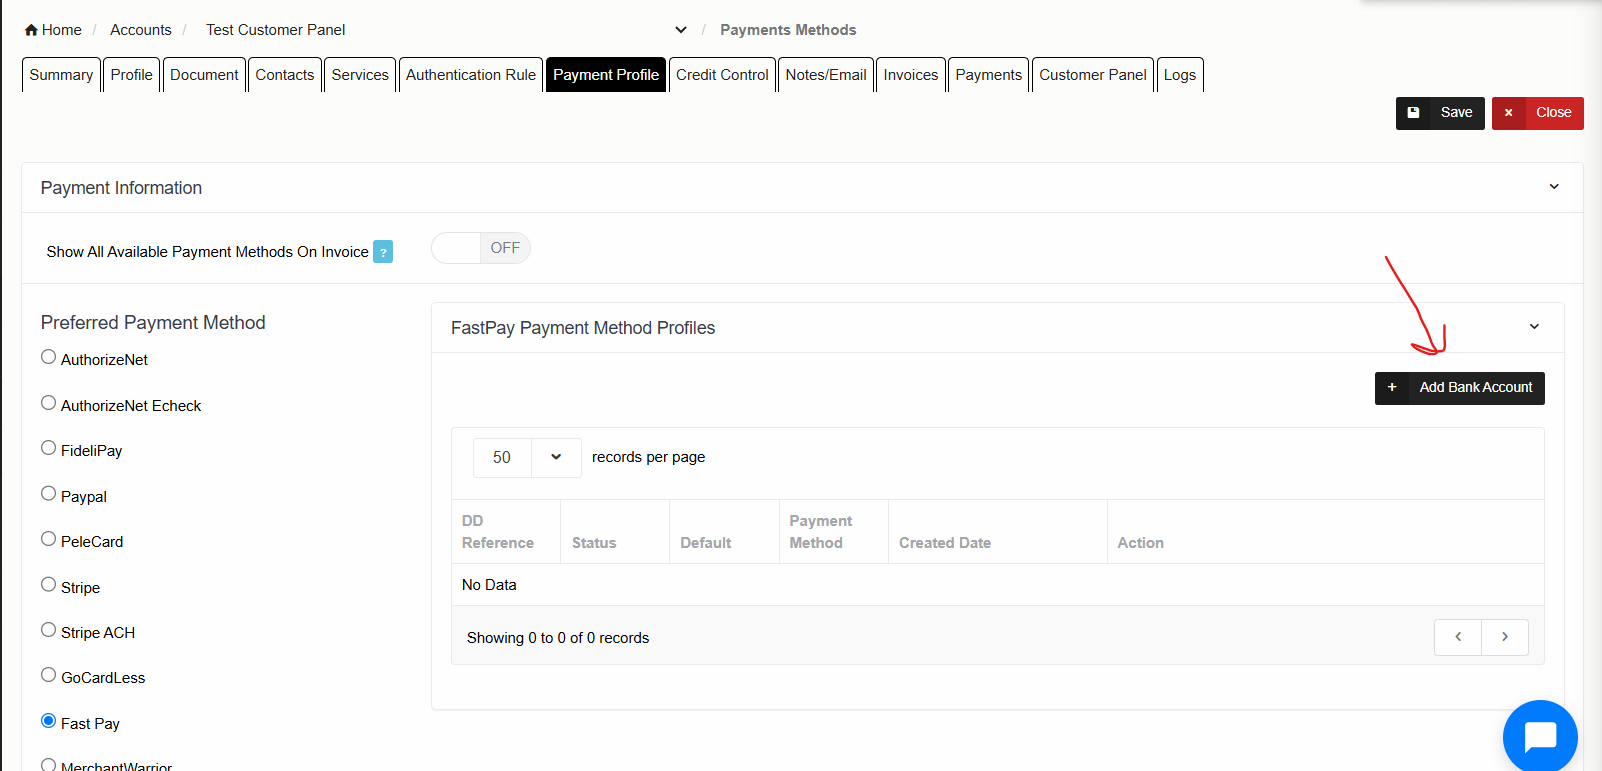
2.Set Up Customer Payment Profiles:
Navigate to Accounts and open the customer profile. Under the Payment Profile section, enable FastPay.
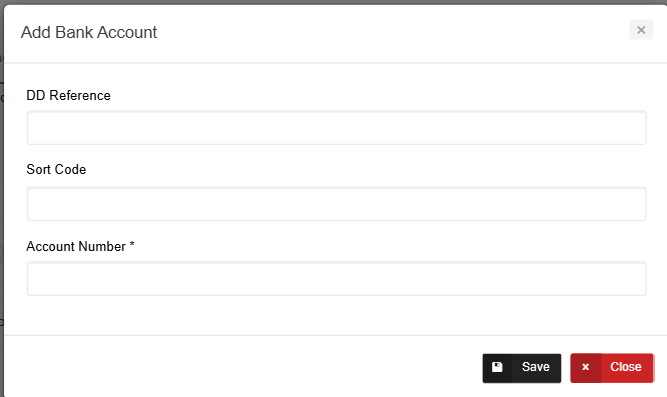
Enter the required Direct Debit bank details, including DD Reference, Sort Code, and Account Number.
3.Export Invoices to FastPay:
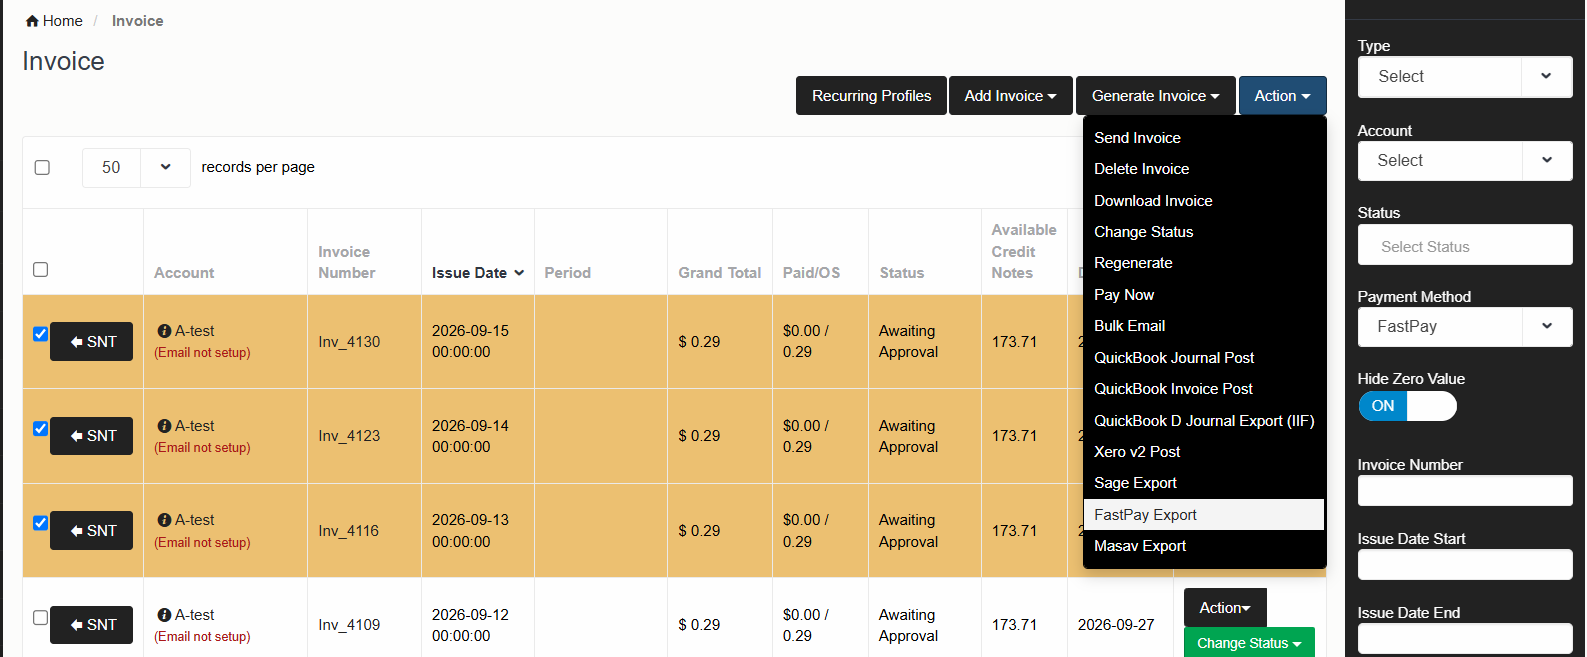
Go to Billing > Invoices. Use filters to display invoices for FastPay-enabled customers. Select the desired posted invoices, click Action, and choose FastPay Export. Confirm the prompt to initiate the export job.
4.Monitor Job Logs:
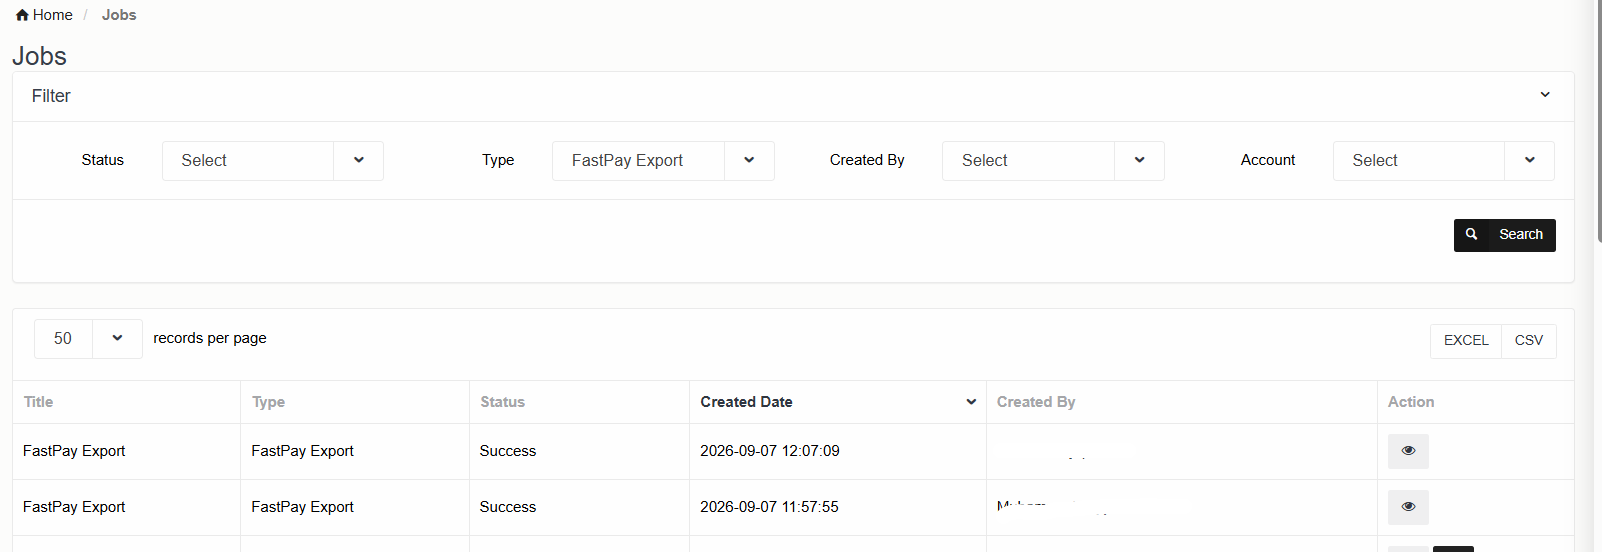
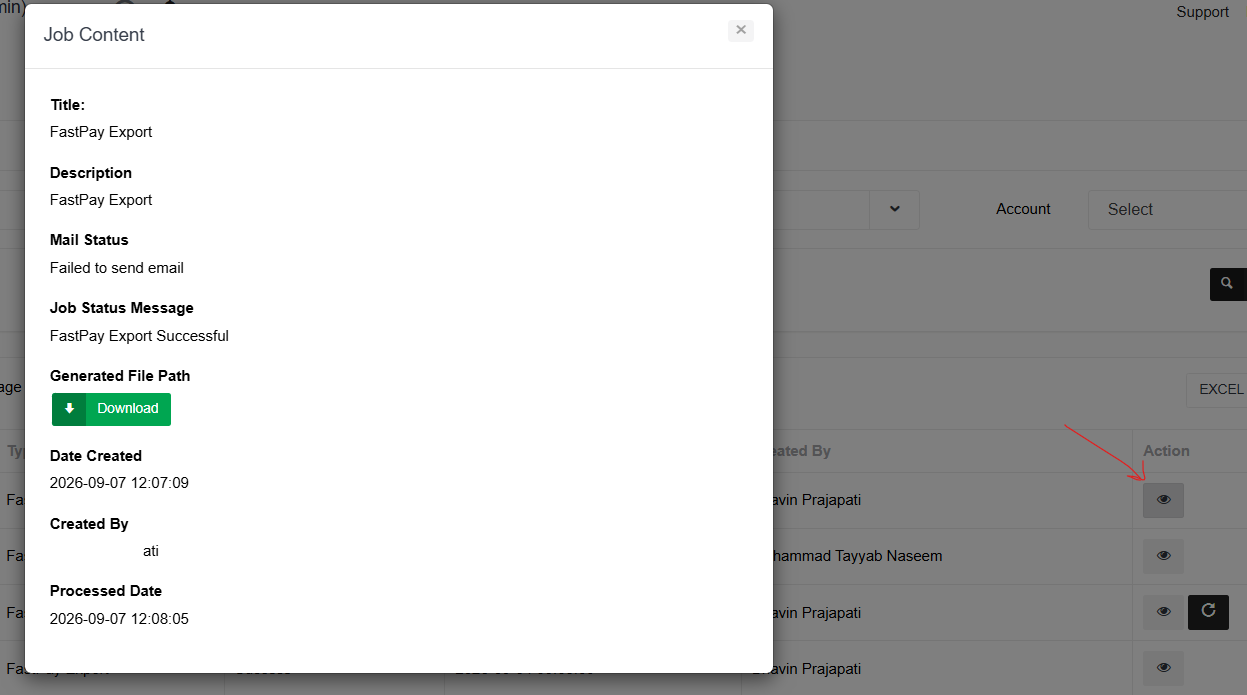
Navigate to Jobs to view the status of the FastPay export batch. Click on individual job records to inspect generated files, submission statuses, and any validation errors.
5.Configure Automated Payment Cron Job:
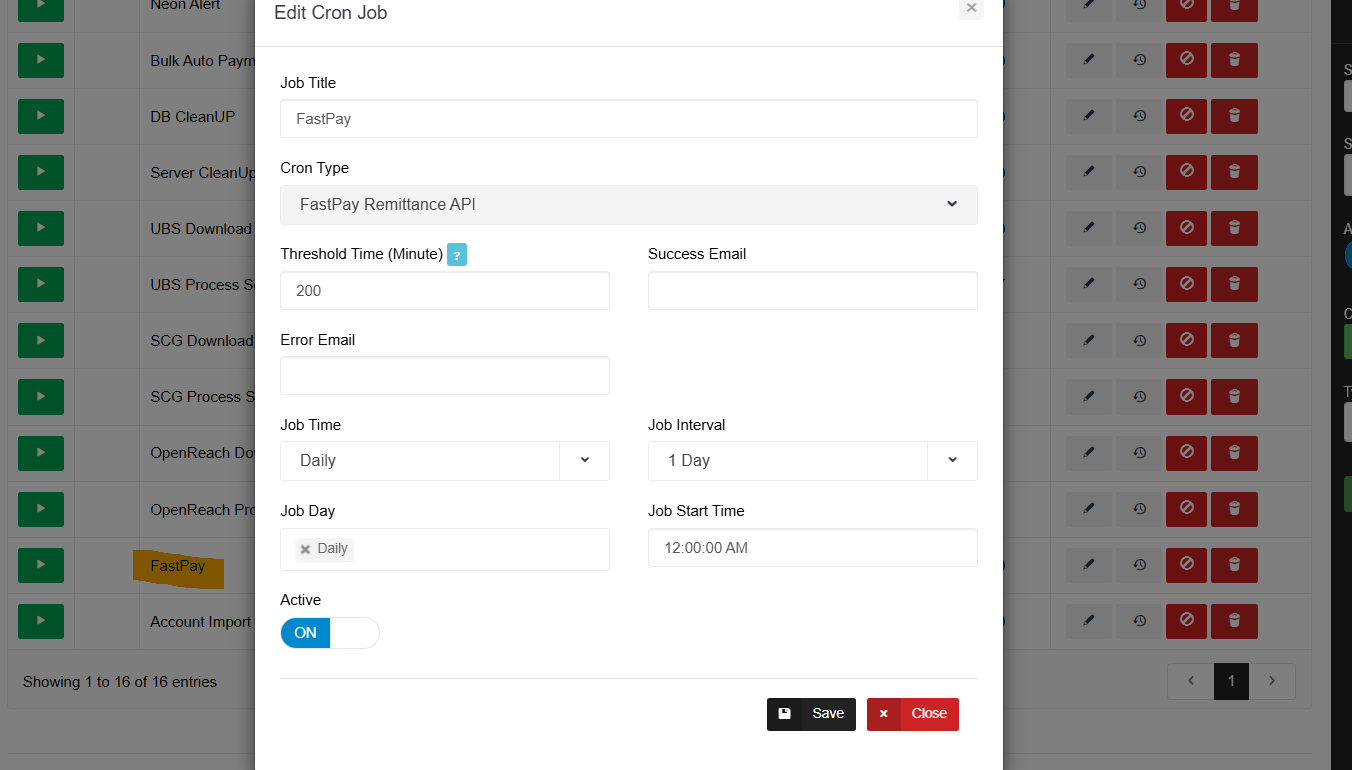
Under Cron Jobs, locate FastPay Remittance API. Ensure the scheduled job is active. This process runs daily to query FastPay for payment status updates, automatically marking invoices as Paid or Rejected based on bank responses.
6.Enable Email Notifications:
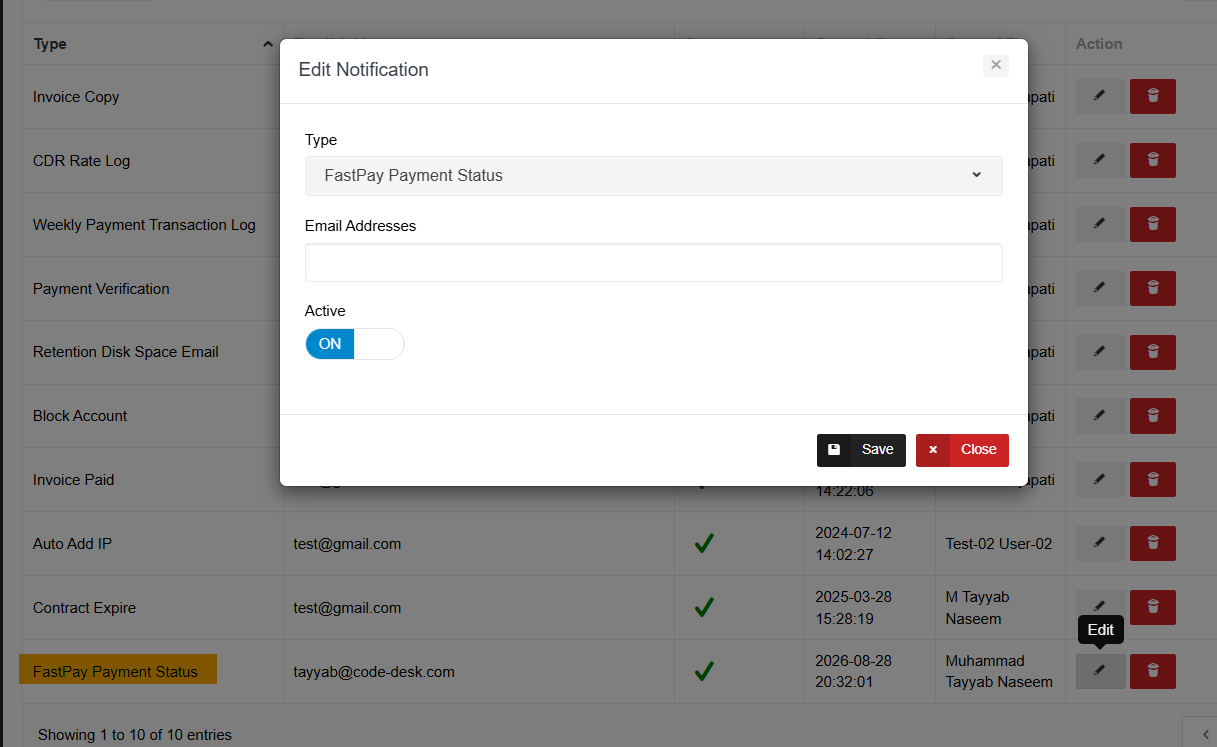
Navigate to Admin > Notifications and click Add Notification. Select FastPay Payment Status as the type and enter your target email address to receive alerts for payment acceptances or failures.
7.Review Payment Audit History:
Go to Cron Job History under FastPay to review execution logs. Filter by date or status to inspect transaction outcomes, including successful collections, insufficient fund rejections, or processing delays.