
Additional Charges Upload
In order upload additional charges, please go to Billing → CDR Upload → Additional Charges Upload
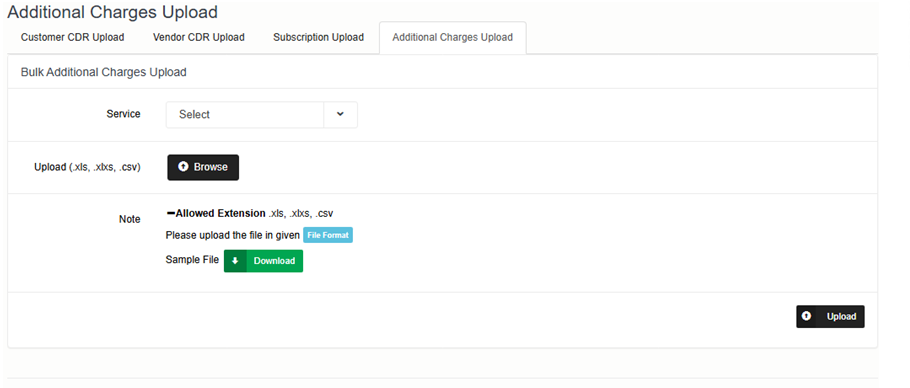
Upon accessing this section, you'll find the following elements:
• Service Dropdown
Select the service to which you want to upload additional charges.
• File Format Button
Click to view a popup showing the exact format and required columns for your upload file.
• Sample File Button
Downloads a sample CSV/Excel file with correct structure and sample values.
• Browse Button
Opens your local file browser to choose the upload file.
Only .csv, .xls, or .xlsx formats are accepted.
• Upload Button
Starts the upload process for the selected file.
File Requirements
Accepted Formats
• .csv
• .xls
• .xlsx
Required Fields (must not be empty or null):
| Column Name | Description |
|---|---|
| AccountName | The account associated with the charge |
| Product | The product name |
| Description | Description of the charge |
| QTY | Quantity of the product |
| Date | Date of the charge (YYYY-MM-DD) |
| Price | Price per unit or total charge amount |
Optional Fields (can be left empty or null):
|
Field Name |
Description |
|
Tax1 |
Optional tax amount 1 |
|
Tax2 |
Optional tax amount 2 |
|
Discount |
Discount value, if any |
|
DiscountType |
Type of discount (e.g., %, fixed) |
Important :
• If even a single row in your file has an error (e.g., missing required field, wrong format), the entire file upload will fail.
After Upload
Job Execution Popup
• Once upload starts, a job is created.
• If you click on job. A popup will show:
• Job status (Success or Failure)
• Detailed error messages (if any) for debugging
Successful Upload
• All entries will be added to the Additional charges table if no issues are found.
Failed Upload
• No entries are added.
• You must:
- Review the error messages
- Correct the file
- Re-upload